Showing posts with label Academic language. Show all posts

Thursday, December 12, 2019

Integrating Depth of Complexity Gate Frames in Math

As December is upon us, so are these three words: deadlines, drowsiness, and decisions. One thing that probably does not change is the running to-do list that seems to pop into your head as your in bed. Don't forget tomorrow you have yard duty. I have to get to work early to make copies of my math assignment. Jacob, Darren, and Julie were absent, so I need to make sure they make up their test. Remember to switch my ELA and math times because students need to leave for band practice during my regular ELA block.  With extra holiday activities and chronic absenteeism, where do you find time to teach and make sure that everyone is on the same page? How do you alter your instruction to present the material in a way so they won't forget it in over the break and without coming up with something new every single time? Little did I know that the solution was one frame, a soft whiteboard, a dry erase marker, and a dry eraser. Yes! That's pretty much it. Embedding Depth of Complexity frames during my math instruction provides a solid structure for students to further their understanding of a math concept and manipulate it in many different ways. It also offers an opportunity to review previous lessons quickly. The best way for students to find the value in these frames is by using them consistently. 

1 DOK frame, 5 skills captured, ALL minds learning
"Remember, yesterday, we learned about inequalities with rational numbers and how to order them, right?" A sea of wide eyes stare back at me, a few nods, and some furrowed eyebrows expressing confusion look back at me. Alright, let me do a quick 5-minute review, and then we will be good to go. I glance at the clock, and somehow 5 minutes turned into 10 minutes, and part of me questions how valuable it was that time and if I will be able to reach today's learning target because of it. Instead of thinking of what I covered, I think about what didn't I cover! I gave simple problems that I could create on the top of my head within a quick second. I didn't check to make sure they could explain and reason their answer using vocabulary, make them represent with a number line, or have them create a situation. To top it all off, the students who didn't need the review are now bored and off task. Its times like these when I wonder how can I be prepared for these hiccups without taking time out of my day to create a review I may or may not need. That's when I realized I needed something that I could have them take out on the spot to review. Something that required students to enhance their ability to follow written directions and me to pinpoint skills for one given math concept-a depth of complexity gate frame with a few icons did the trick. I didn't realize how much one little paper could allow me to focus on the problematic math skills but also be able to walk around and pinpoint the areas of weakness of strength within a second. With embedding these frames, I could complete
maybe three problems. Now, this may not sound like a lot. Still, within these three problems, students created a real-word problem, used and internalized academic vocabulary, explained the reasoning of their answer, provided their solution in an equation, and, last but not least, provided a drawing. Now I am not saying that the second I introduce them to a new gate frame, they will meet my expectations, so when I provide them with a new one, we complete one together on the smartboard. I then give an example they can complete on their own. I've learned that sometimes, students need to feel as if they can do it. It doesn't matter that they have seen the directions one hundred times; the fear of not visually seeing your expectations can hinder them more than anything. The way I see it, if a student is willing to use my example to benefit their own understanding, then we are all winning and the ability to understand another's thinking has been internalized.  

The begining .. but definitely not the end
So as all great things, the start of something new starts with the creativity of the teacher, however once you have created it, it can be used for years to come.


  1. Pinpoint what math concepts students struggle retaining or are vital in knowing throughout the movule. Ex. Double digit multiplication
  2. On a document edit the gate frame using icons and list components that are necessary for that skill. For example, in fourth grade for multiplication the strategies would be place value chart, area model, partial products, and algorithm form so those would complete your gate frame. **Lets say there are different components of one skill-integers/rational numbers then create multiple frames for that skill in scaffolds as seen in the photos. 
  3. Print a copy for each student on cardstock and pass them out to place in a soft whiteboard (White cardstock on one side and red cardstock on the other). Students will slip the frame on the top. When it is time for a new one they will leave the previous ones and add to it. This helps review any strategies on a drop of a hat. 
  4. Use as a quick warmup (fluency) for a lesson or to introduce a topic or to review a series of strategies within a topic/Module. 
  5. Provide an example for students if necessary for the first time. Then only circle one or two portions of the gate frame. Continue adding portions until students understand or have been taught all portions of the frame.  
  6. Put on a timer and allow students to complete independently while walking around the room and monitoring and assisting where needed
  7. Pull students together and review their soft whiteboards visually and continue with following problems.
Taking it further

Accoutability: 
  • Check one student's board if everything is correct and have them check their tables to determine their answers. Have them explain to a student if they do not understand. 
  • Count it as an exit ticket
  • If a student is really struggling with a portion of the frame, check the students by staying "yes" provide another problem for them to do, but doon't allow the struggling students to move on. Allow them more time to continue with the problem they are on. 
  • Let students know that they will share their answer to a class under the document camera and another student will be referring to the frame as they are talking about it. 
Collaboration/: 
  • In pairs, divide the portions of the gate frame between the two-meaning each student has to complete two portions and then when they come together they will have to determine if their answer is correct and if they can support it with numerous methods. 
  • Allow students to complete one whole gate frame as a team switching up the portion of they gate frame. 
Kagan:
  • After completion of the gate frame allow students to discuss their answer with others, especially if a challeging problem or a skill students struggle with. Students can complete with a mix pair share, complete as a team almost as a jigsaw rotation


Regardless of when you decide to implement gate frames within the school year, the impact they can make is tremendous. Remember there is no right or wrong way to create a frame. I encourage you to create one for an upcoming module or even a past one that you feel students may forget.  


Lively Teaching,

Miss Magana


Thursday, November 7, 2019

Integrating Visuals in Order to Build Connections in Math

"Numbers, Pictures, Words!" I am a broken record as I walk around the room and gently remind students that when completing word problems, they should have all of these three criteria by using the Read Draw Write process. As we all know, if students can use the skill successfully in a word problem, chances are they have mastered it. In 6th grade, I have come to realize, few lessons introduce a new concept without a word problem or two, so as I collect their exit tickets or tests, I am looking for these three criteria. I expect students to struggle, but the part that amazes me is what the struggle is. Some students complete the problem correctly, but their picture does not match their numeric solution. Others provided a perfect model with an inaccurate and illogical answer. The worst scenario is when they all seem to get it just to present you with wide eyes the next day when you give them a similar problem to the day before! *Cue sad music here*. Students haven't internalized the connection between their pictures and numbers, which leads to difficulty when they are trying to provide reasonableness to their answer. Is this important? Yes, because as well all know, it wouldn't be Eureka or common core if it didn't have a picture or strategy when teaching a skill. The great thing is that the solution requires 1 question and some old fashion color coding! 
                
                                                                                
                                                                               I see it!!! Can't you??
When I look at our program, I am thankful that we teach multiple methods and models to assist our students in their understanding of something as simple as addition. Models were something I wish I had growing up. As a visual learner, multi-step word problems were tricky if I was unable to picture it. I still remember the problems that sounded like this "Now Jerry lives 3. 8 miles from school and 2.6 miles from his house lives Sherry in the opposite direction. Jack can travel to the school and back in 8.6 miles. If they walked to school tomorrow, how many miles would they walk all together to arrive to school? So there I was, drawing squares to represent buildings and arrows to represent paths to their destination. Most students today could solve this problem with three simple tape diagrams and a few labels. So why the disconnect? After countless examples of a problem side by side with a tape diagram/model, they still didn't see it!  So I did what I do best when I want things to stand out--I color-coded, and the students helped me. When you make the students find the connection, they are more likely to see it and internalize it on their own. 


Bridging the GAP and making the connection
Incorporating this strategy can be completed or every lesson. The following steps to incorporating this into your lesso is simple. This is how I embed it into my daily lesson. 
1. Complete problem with your picture and your drawing. 

2. Once your model is side by side with its corresponding drawing, you break up the equation and ask students to connect it to their picture by using the following stems using my example.
          "I see 45 in my equation, but where do I see it in my picture/model?" 

3. Have students look at the picture and tell me once they see the 45. Once they have done this I color code them the same color-in the example it is represented in pink. 

4. I continue this process with all the pieces within the equation. "I see 3/4 as my divisor, where do you see it in my picture?" and then color code it--in the example it is represented in blue. 

5. I continue this process with the answer of my problem. " I see 60 as my quotient, where do you see it within my picture?"

6. Now lets look at my answer and see if based on my picture if it logically makes sense. During this time I discuss that the whole tape is bigger than the 45 which makes sense because it is only 3/4 of the tape and 15 + 15+ 15+ 15= 60. 

7. Once we have completed this together then I reveal my overall anchor chart for that lesson that have the same colors. I then leave this up throughout the entire lesson for students to refer to. You can complete this on any following problems and that way throughout the entire lesson you are building that connection. 

8. In my class I wll have students complete a seperate problem color coding their work OR provide them with a copy of my anchor chart that we colored together to glue in. Students can continue to refer to it as the module progresses. 

I have seen a big change in my students when they are required to make connections between their numbers and pictures. This is a valueable tool that not only allows for class discussion and reasonableness. 


                                                                  Lively Teaching, 


Jessica Magana

Wednesday, April 10, 2019

Children: Full of Life

If you have read my posts this year, you may be aware of my instructional focus on writing all year long.  One of my main writing routines has been Reflect and Respond Journaling in which students are given an interesting writing stimulus such as a picture, a video, a quote, or a prompt.  They are to reflect first and then to respond in whichever manner they wish in their journal.  Afterward, they are invited to share their writing through our Author's Chair in the classroom.

However, I wanted to share with you a very powerful documentary I watched many years ago and forgot about it until recently.  In this documentary, a 4th-grade teacher in Tokyo instructs his students to write their true feelings through letters in their notebooks.  They read these out loud in front of the class.  By sharing their lives, the children begin to realize the importance of caring for their classmates.

It truly demonstrates the power of writing to empathize with others, be vulnerable through writing and how writing can create a classroom community.  It is truly inspiring.  As we move towards the testing season, let us not forgot the importance of instructing the WHOLE child.  There is no test that can measure the character of our students other than how they treat others.

Be warned....if you can make it through the first 10 minutes without shedding a tear, you are strong!  Enjoy.


Happy Writing!
Gustavo Macuil

Tuesday, April 9, 2019

Poetry Madness


Every year it is a challenge to bring in some great examples of interesting and thought provoking poetry which connects to our unit of study.  Each time I am usually met with groans of frustration at "hating poetry."  I even hear the same responses from other teachers and I get it...poetry IS hard because it is often not straightforward, but it doesn't have to be groan-inducing.

An amazing reversal poem
written by an inspired student..
Read each line top to bottom
then bottom to top.
This year I wanted to try a different approach.  I had seen mention online of an approach other teachers take and I decided that what my students really needed was to find enjoyment in reading poetry, not to understand structures and analyze difficult texts. Poetry March Madness was the key to my struggles!

Honestly, I was not expecting this to be as exciting as it ended up being for my classes but it ended up being what they looked forward to every day.  I went from hearing, "Ugh. A poem." to "Are we going to read poems today?" and in the end I even had kids voluntarily writing poems emulating the structures of some that we looked at.  Amazing, right??

Really this was a pretty simple thing once I had it all set up.  Here is what I did.

Five Steps for Poetry Madness Success
1. Select 16 poems. I used lists I found online, poems recommended by other teachers, and poems that connected to our current novel unit. I tried to pair each set of poems by subject or style.  Then I placed them in the brackets.  Poetry March Madness Brackets
2. Read two poems with your students every single day. 
3. Briefly discuss the poem ("What did you like about the poem? What do you think the point of it is?")  Keep the discussion brief and positive. This took no more than 10 minutes each day. I printed both poems side by side and also projected them onto the board.
4. Allow students to vote for their favorite of the two poems. I used Plickers and Google Forms but also sometimes had them get up and move to the right or left side of the room according to their votes.
5. Repeat the process for all eight pairs/16 poems.  Round 2, 3 and the finals will be quick. (See the video for how the bracket works). The whole process takes 15 days.

Things I learned in the process
1. Choose equally amazing poetry so that it is difficult for students to decide.  I was able to turn some of the discussions into an impromptu Philosophical Chairs discussion because they were struggling to decide.  When we read "Nothing Gold Can Stay" and "We Real Cool," I only had a few votes for "Nothing Gold Can Stay." I knew if they talked it through, the votes would change. I let them debate a few minutes and the final vote ended up being really close in all groups.
2. Reflect on the discussions from students and make adjustments. Next year I'll probably adjust the first four poems.  They were great for round one but didn't really stand a chance in rounds 2 or 3 because there wasn't a lot of depth to them. I also ended up changing two poems near the end because of the timing we would have read them. It would have given away a big plot point in the novel we were reading if I had kept them.
3. Don't tell them that "The Rose That Grew From Concrete" was written by Tupac until after they discuss and vote.  I learned this one quickly and changed my approach for the second class!

Our School-wide Read unit after testing focuses on poetry and I know that getting my students excited to read, analyze, and then write poems will not be hard this year!

Comment below with something that you tried out and found that it worked better than you expected it to.  I can't wait to see what you share!

Keep the magic alive,


Kandyce Valverde
Follow me on Twitter for more classroom updates! @valverderules 

Monday, March 11, 2019

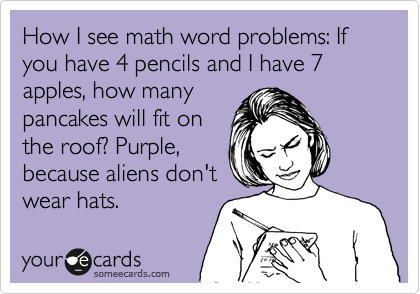
Think Like a Kid by Randi

Think Like a Kid
How I see math word problems: If you have 4 pencils and I have 7 apples, how many
pancakes will fit on
the roof? Purple,
because aliens don't
wear hats.
 As a kid, I hated math!  Just ask any of my teachers. Or my mom. Or my sister.  I hated it.  I hated it so much that I would feel sick every morning because I feared my teacher would call on me and I would not know the answer.  I remember the nights of staying up very late trying to finish my 30 question math homework and only completing five questions to find out the next day they were incorrect.  I remember thinking what's wrong with me- everyone understands except for me. Math just didn't make sense.  It was so abstract and seemed to move so fast.  Most of my teachers just explained it one way and moved on.  The way they explained it never seemed to click.  This is how I saw math: 
  
Want to hear something funny?  I tell people all the time and it's true that it wasn't until I began TEACHING math that I truly began to like it.  Now it is one of my favorite things to teach.  As silly as it sounds, I think my struggle to understand math as a child only helped me be a better math teacher.  I think this because I am always saying to myself "Stop and think like a kid."  I am constantly asking myself:


How can I make this relatable to my first graders? 
 How can I make this boring math lesson come to life? 

Eureka is a challenging program that gives us many opportunities to make math fun.  Math can be intriguing and exciting for our students. Eureka has helped guide me to prevent boring lessons and in turn, replace them with lessons that are packed with collaboration and engagement.  Here are some ways I make that happen::

Implement Engaging Routines
Kids love routines.  Routines will help maximize time because your students know the set expectations.  For example, most days we start math with a timed Sprint.  We pump ourselves up by chanting "I am a mathematician, I will try my best because I am awesome and I can do this!"  They have 1 minute to do Sprint A, we correct it, and then they count how many they got correct and write it on the top.  They then do the same for Sprint B.  They celebrate their growth even if they only got one more right.  Growth is growth!  My students love this routine.  My students are engaged at this time and look forward to beating their own goal.  My students love this personal competition against themselves.  

Make It Hands-On
Most of Eureka's lessons are very hands-on.  Whether it be fluency activities, application problems or concept development a wide variety of hands-on tools can be utilized daily.  I like to present my lesson using interactive Smartboard lessons. This is a great way to entice your visual learners. Clear and student-friendly visual representation is a must for student engagement. Math Manipulatives are our friends!  Don't be afraid to use them.  I like to provide my students with math manipulatives for just about everything. I believe they are beneficial in all grade levels and are crucial for conceptual learning.  Some of our favorites are the number line, dice, unifix cubes, the rekenrek, centimeter cubes, coins, dominoes, and tangram shapes.  It is also fun to bring in real objects to teach a concept.  My student love when we use items such as beads, candy or blocks to add and subtract.  

Play Games
So much of what we do in Eureka can be seen as a game.  My kids are always saying "Yes, I love that game."  Fluency and Concept Development are a great time to play these games.  My kids love Happy Counting it's like a math version of Red Light, Green Light. They also really enjoy playing addition and subtraction with cards.  In this game, pairs use cards to each make an addition or subtraction sentence.  The student with the highest or lowest answer gets the cards. The student with the most cards at the end wins.  Lately, we have been working in pairs to create numbers using unifix cubes.  Each student shows a different number using unifix cubes or with a tens and ones drawing and then they take turns placing a greater than or less than sign in the middle to compare numbers. The most important part of incorporating math games into your lesson is to encourage cooperative learning.  It is a great way to create an environment where it is common for students to work in pairs or small teams.  They can solve math problems while holding each other accountable.  

Encourage Math Talk
Kids like to talk.  It's so important as teachers that we model how to have meaningful conversations during math instruction.  Once modeled and practiced kids will naturally start having these conversations with each other.  To get them there I make sure to ask more open-ended questions.  An example of this may be to ask "Why did you use that strategy to solve that problem?"  It's also beneficial to ask questions that have more than one answer.  My students love to give multiple ways to solve one problem.  It's fun and challenging!   

Differentiate
There are many ways to differentiate a math lesson.  You can differentiate the content, process, and product.  I like to do this, especially during the Application and Problem Set.  During the Application, I like to give kids the choice to choose which strategy works best for them.  If a student still feels comfortable drawing pictures they can while others might choose the break apart strategy and that is ok. Drawing is a great differentiation.  Picture representation leads to using only numbers and symbols which can be very abstract to some kids. During the Problem set, I know that some students might only be able to independently and successfully complete problems 1 and 2 while others can complete the entire page.  This is ok... It's not quantity; it's about quality.  I want students to feel successful and not stressed out over math.  You can break down many roadblocks for kids by meeting them where they are on their math journey.

Have Fun
Just have fun!  

  • Try acting out word problems. It really helps for them to see what is actually happening then to just hear it.   
  • Sing songs and listen to music during independent practice. I know many people who memorized their multiplication facts by turning them into catchy tunes.  
  • Cheer each other on.  We like to use cheers to praise not only ourselves but also each other.  Creating an encouraging environment can help melt away the fear that some of our kids have about math.  They motivate and encourage our students to persevere.
  • Get up and move!  Always keep your kiddos moving.  Kids can be moving a lot during fluency activities.  Our favorites include jumping jacks or cross punching while skip counting.  
  • Let them create their own problems.  This is so much fun.  They love creating silly scenarios for their partner to solve.  When kids can relate and make sense of something on their own they never forget it.  
Ok! I could go on and on.  I have learned to love math. Yes! I am saying it-I LOVE MATH...  Why? Well, because I now find joy in it.  It's fun and engaging.  I see the spark in my student's eyes when I tell them it's math time.  I am making a difference by making math an hour of excitement rather than dread.  I am taking away the fear and replacing it with smiles.  Math can be fun and we can teach our kids to love it.


      Positively Teaching,   
Randi Muehlen
                           

Tuesday, February 5, 2019

Podcasts for Differentiation


It seems like I am always looking for ideas to differentiate work for students to fit different preferences for performance options. So many of our final unit assessments in ELA are essays and, though I don’t discount the value in having students write an essay, sometimes it feels like that is all they are asked to do in so many of their classes. For kids who struggle with putting words on paper, this is a huge task to attempt and some students feel like giving up before they even start.


During Winter Break, a colleague sent me a link to NPR’s student podcast challenge. This was my chance to differentiate my next unit project!  The planned final project required students to reflect on their learning by writing an informative essay and creating a slideshow that they would present of their change in perspective during a exploration of values in other parts of the world and their own lives. It was a HUGE task to ask them to complete.

Then a thought came to me... 
what if I added an alternative to this task? 

Instead of completing those two pieces, the alternative would be to create a podcast addressing all of the same information. For the students who struggle with putting words onto paper, they would have the opportunity to just verbally say what they would have written. It also benefited the students who freeze when presenting because now all they would need to do is to play their podcast for the class as their presentation. It would be a win-win for those students!

I presented the option and was pleased to hear some of the students say, “a podcast?? I do those already in my free time!” Okay, only one student actually said that. However, I was happy to hear excitement about the choice from a handful of students in each period.

Last week, assignments were due and all week, we have been presenting them. The students loved hearing the podcast as opposed to watching a student presentation. Also, it is amazing how many of the Speaking and Listening standards (often forgotten or only briefly touched upon in middle school) actually are met with this one assignment! The students creating the podcasts were presenting their claims and findings (SL 4) and adapting their speech to a new context (SL 6) while the audience members were analyzing the main ideas and supporting details of the presentation (SL 2) and evaluating the speaker's reasoning and argument (SL 3).  The students were practicing multiple skills which will help them in their future years without even realizing it! And what if this were an option for students to complete with a partner?  How wonderful would that be to see the creativity that went into involving another student in the project??

Some podcasting resources you can use:
1. NPR’s student podcast challenge. The student materials also have great examples of podcasts that I had my students listen to to determine what they wanted to include in their own (for those who don’t make podcasts in their free time😉)
2. A list of apps you can use to create your own podcasts.  I had my students download Anchor and they found it fairly easy to use.
3. Here's a link to one of the submissions.  This was her first time ever creating a podcast and she included every single thing the assignment asked for and did it in such a way that we could really hear her "voice" as she presented!

Let me know if you've ever tried something like this. I would love to hear about it!

Keep the magic alive,

Kandyce Valverde

Sunday, January 27, 2019

Got S - t - r - e - t - c - h Text? (PART 2)


Thank you for returning to my 3-part blog regarding stretch text.  Last month, I introduced this idea of what stretch text means in the classroom.  I highlighted some frequently asked questions and this month I want to continue sharing some of these insights and questions with you!


FAQ's:

Why stretch text?  http://www.corestandards.org/assets/Appendix_A.pdf  Read pages 1 - 11


What essential questions can I use during stretch text lessons?  The one essential question that I use during ALL stretch text lessons: “What makes this text difficult?”  This simple yet powerful essential question is what I want my students to think about throughout the lesson.  By “deconstructing” the text, my students can dissect, explore, investigate, and “reassemble” the text like a puzzle.  If they can succeed with stretch text, they will certainly succeed with grade level text. Ultimately, I want my students to think about their thinking.

Where do I find stretch text?  NOT on Teachers Pay Teachers!  Instead, I have found that famous speeches or Ted Talks are ideal to use as stretch text (they are also free).  Try to select speeches that are relevant, engaging, and meaningful or that tie into Wonders anthologies in some manner.  For example, in fourth grade Wonders unit 4, week 3 includes the anthology selection The Moon Over Star.  This historic fiction selection focuses on the night of the moon landing.  You could tie the famous Moon Speech by JFK to this particular selection (which I actually have done).  Another example in fourth grade Wonders is unit 4, week 1 leveled reader “A Day in the Senate.” Last year, we deconstructed part of the Constitution using it as a stretch text in order to extend the understanding of the leveled reader.  The possibilities are endless. I try to make sure that my students understand that my selected stretch text is either part of an article, document or a transcript of a speech. This is why I try to avoid TPT worksheets or TPT articles. It is no secret that Common Core has made the understanding of technical texts a cornerstone of these new standards.  Stretch text lessons allow the teacher to at least begin to encourage and build self-efficacy within students in order to challenge them to continue “reaching and stretching” their reading abilities. My "look for" when I am searching text is mainly vocabulary. Does the text include a fair amount of academic vocabulary for students to grapple with? Be careful though! Too much may become too frustrating.

Note:  If you find a video on youtube, it usually offers the option to view the transcript.  Copy and paste the transcript onto your desktop in order to print the text for students.

How long do stretch text lessons take?  If you decide to do stretch text lessons during a 30-minute time block of UA, you can expect to take approximately three to five days to grapple with the passage.  It really depends on how deep you want students to go into the text. It is up to you and your learning outcomes.

Are there any resources that I can use?  Yes, I have included below some links that you can view at your leisure to see some examples of stretch text lessons.  Be warned, you will not find much resources by googling “stretch text.” You will usually find resources about accessing complex text (which may in itself be helpful as well):

1.  READ pages 1 - 11 in Appendix A of the common core initiative document (yes, I know it may be a struggle but, hey, if you want your students to do this, then we need to do this as well):

2.  Teaching Channel videos:
https://www.teachingchannel.org/video/teaching-declaration-of-independence


Happy Writing!
             Gustavo Macuil

Thursday, January 10, 2019

Celebrating the Book Nerd in everyone


I started off the school year with a lot of enthusiasm for reading in my classroom and I loved every minute of it. However, like it happens so often, once the year started up it was hard to keep daily discussions about reading as a part of our lessons because, as you all know, it is so hard to find time for everything! I know that I didn't want to give up the focus on reading but I just didn't have the time. It's every teacher's continuous battle, right?

"If you don't like to read, you haven't found the right book" --J.K. Rowling 

My solution: Book Nerd Day!!
As a solution, I planned for one day out of every month that would focus completely on reading. The name, "Book Nerd Day," just made it more fun of course!  The plan was this: create structured activities that focus on reading and allow student choice in what they accomplish. I also attached an expected point value to keep students on task and directed. This allows students to respond to reading with differentiated tasks where they feel comfortable showing mastery. It's a win-win situation.

The Set Up
The night before our first Book Nerd Day, I rearranged the seats and set up stations around the room so that students would have all materials needed and could move from one location to another to complete activities around the room. Each station had directions and materials laid out.

The Choice Board
Poetry and illustrations
about books
In creating my choice board, I consulted ideas found online and put them all together. As students worked through and completed them, I kept track of which were most popular so I can adjust for our next Book Nerd Day (Coming soon on December 19!!) Students loved the poetry and letters to authors the most of everything. Here's a link to the first draft of my choice board.  The link also includes the titles and directions for each station. I printed them and put them up at each station (as pictured above).

Letters to authors
The Results
During the day's activities, I was able to check in with many of my students about what they are reading. Also, I heard so many students sharing what they have read with other students...with ENTHUSIASM!!! Their work showed so much about their comprehension and how much they liked or didn't like their books. Then, because I teach Middle School and they're all about the social media, I posted student work and tagged the authors of the books. The students loved hearing responses to what they are writing and this validated their own work by putting it out there into the world.


Pam Munoz Ryan??
Unbelievable!!


Our Next Book Nerd Day
The second Book Nerd Day is scheduled for December 19 and the students can not wait for it! Because of what I noticed with some students and where we are in the semester, our second one has some stipulations that the first did not. Everyone participated in the first Book Nerd Day. Students who are behind with their work or have not been on task for the week will be sent to another classroom to complete classwork needed. I won't do this every time, but for this time in this month it works out perfectly.

Comment below with your questions, comments, or thoughts!


Keep the magic alive,
Kandyce Valverde


Wednesday, December 5, 2018

Got S - t - r - e - t - c - h Text? (PART 1)


Image result for kids stretching

So a few years ago, my principal challenged us to include stretch text during our UA activities.  I remember thinking: "What IS stretch text?"  

This seed began to bloom in my curiosity to know, understand, plan, and deliver lessons using stretch text. Here comes the reality:  there is minimal - if any - resources out there.  Thus my journey began. 

That year I began working closely with my evaluator, the assistant principal, as well as our site data coach.  Through a variety of co-teaching opportunities as well as collaborative planning sessions, we began to understand this idea of "stretch" text.  Please be aware that I am sharing my learnings and I will be sharing these throughout the next three blog posts so if this is something that intrigues you, please return!

In order to make sense of how stretch text works, read the Frequently Asked Questions below.  On my last post, I will include a video lesson of myself delivering a stretch text lesson.


FAQ's:

Why stretch text?  http://www.corestandards.org/assets/Appendix_A.pdf  Read pages 1 - 11

What is stretch text?  Stretch text is text that is far above a student’s Lexile range.  For example, if a student’s Lexile range were 650 – 800, then an ideal stretch text would be anything above, say, 1000+.   Expect students to struggle with stretch text.  However, through this experience of grappling with text that is complex, sophisticated, and academic, students begin to build grit and stamina.  They begin to use previously learned comprehension strategies in order to figure out the “gist” of stretch text, if not more.  NEVER underestimate what your students can do!  Avoid “rescuing” them from the struggle.  Delete any assumptions.   You will also find that stretch text lessons are organic.  You may plan a sequence of activities to meet your goals but do not be surprised if you need to alter these due to unexpected new learning or understanding.  Let the students lead and tell you where to take them next.

How do I explain stretch text to my students?  I usually teach my students the difference between reaching and stretching.  Their independent reading range is “reaching” – it implies some effort and they can “reach and grab it.”  On the other hand, “stretching” implies much more – more energy, more effort.  When we stretch out for something that is out of reach, it requires our whole body to help the arm grab it.  Sometimes we can, sometimes we cannot but we keep trying.  I have also used the idea of weights as an illustration.  In order to build more muscle, a person needs to increase the weights when they workout.  After much practice, they notice that the weights are not that heavy, so they have to adjust the weights again.  Highlight the fact that reading high-level text is like working out, it might be painful at first but the results are beneficial.

When can I teach a stretch text lesson?  I usually try to fit stretch text lessons during the end of unit testing week in Language Arts. Usually, the sixth week of a unit in Wonders would be a perfect time.  Stretch text lessons are ideal for UA since students are grouped within a focused Lexile range.  For example, my current UA group is reading within 600 – 750 Lexile range.  An ideal stretch text for the whole UA class would be anything above 1000+ Lexile.

Are there any resources that I can use?  Yes, I have included below some links that you can view at your leisure to see some examples of stretch text lessons.  Be warned, you will not find much resources by googling “stretch text.”  You will usually find resources about accessing complex text (which may in itself be helpful as well):

1.  READ pages 1 - 11 in Appendix A of the common core initiative document (yes, I know it may be a struggle but, hey, if you want your students to do this, then we need to do this as well):

2.  Teaching Channel videos:


Happy Writing!
          Gus Macuil


Most Viewed Posts