Monday, February 26, 2018

Comments vs. Questions

Comments vs Questions

Have you ever asked your class, “Does anyone have a question?”  Did your students actually ask a question?  Did your students share a thought?  
 
In my class, most the time my students make a comment.  This is when I realized my students need to know the difference between comments and questions. I needed to work on teaching them the difference between asking a question and telling. I also needed to teach them how to ask questions.

“Once students learn how to ask their own questions, they can become active learners in every classroom, no matter the subject.”
-Dan Rothstein and Luz Santana
Teaching young children how to ask questions

Teaching the skill of asking questions is a skill that can be accomplished with regular practice.  All students are capable of learning this even in first grade!
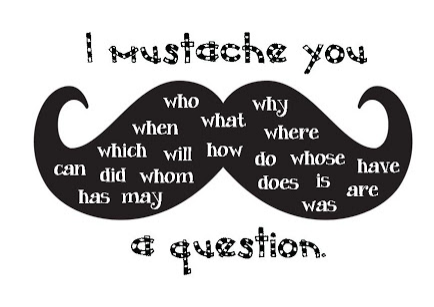
I start with basic lessons, such as, categorizing sentences that end with a period or a question mark.  We then practice correcting sentences using the correct punctuation.  I also teach words that help begin a question, like the I mustache you a question chart above.  This helps them formulate questions instead of making comments.  The most fun part is teaching them to raise their voice as they ask their question.  A question and a statement do no the sound the same, they begin to recognize that in how it sounds.  These mini lessons are valuable in my classroom because once my students know the difference between asking and telling, they begin to ask really good questions.  They are curious and extending their thinking beside answering my questions.  My next step is to begin training them in asking each other questions while we are reading a text or explaining our math problems.  Join me next month to read how first graders question each other!      
0817171448-1.jpgAlways Learning,
Sabrina Blackwood

Lunch Buddies

Lunch Buddies

When Punxsutawney Phil saw his shadow on February 2, he got scared and went back in his burrow.  This indicates there will be 6 more weeks of winter...

But in my class, spring has come early this year; every teacher has experienced the phenomenon that is known as Spring Fever.


spring fe·ver

spriNG ˈfēvər/
noun
  1. a feeling of restlessness and excitement felt at the beginning of spring.

After a particularly rough two days of spring fever behavior, I had the weekend to figure out what and how I was going to get my kindergarten students back on track so we all survive the next four months of school. One blogger I follow mentions often about how he eats lunch with his kindergarten students... every. single. day.  I thought he was crazy!  My lunch is my time to socialize, vent or discuss the morning events with my friends/colleagues/ADULTS.  It's when I can do something for myself without 5 kids needing me for something. I always remembered this tidbit about that teacher I admire and how he recommended it for all teachers because of the relationships that are built during this sacred time...

And I was desperate; desperate for something to change. So one of the things I decided to do is to eat lunch with two of my students every day.  One student would be the helper of the day and the other would be a student of the helper's choice.  I wanted to make this time special, so I went to the teacher/mom/housewife mecca that is Target and I bought some cute trays, cups, placemats, and utensils with a camping theme.  I bought myself a thermos so I wouldn't need a microwave to heat my food.  I was getting mentally and physically prepared to give up enjoy my duty-free lunch with some of my students. every. single. day.

"Great teachers focus on connections and relationships." -Eric Jensen

I've always felt that I make good connections with my students, but after the first week of spending one-on-two time with my students,  I realized I could've been doing more to foster a deeper connection. My lunch buddies are so excited that they get to eat lunch with their teacher that they don't even want to go to recess after we eat; they'd rather continue to sit and chat with their friend and me.  We talk about food, our families, whatever they want. I let them lead the discussions.  The quiet girl who barely speaks in class?  She was a chatterbox for the entire 45 minutes. The rambunctious student in class was nervous and shy to be with just the teacher and one friend.  I've learned more about my students during these times than I thought I would. I have learned to just enjoy their company without hustling to get to the next lesson or being worried about what I still need to prepare for class. In the end, what I thought would be a sacrifice on my part is really a pleasure. I actually look forward to this special time each day! Like Mr. Greg from thekindergartensmorgasboard.com, I recommend eating lunch with a few students for an extended period of time without an agenda, but just for enjoyment. Of course, my hope for the outcome is that our deeper connections will help settle the restlessness within my classroom.  Time will tell on that, but I feel very optimistic!

                                  Happy and Positive Teaching!
                                             Erin Grebel


Friday, February 23, 2018

Doceri and iPads (Technology)


Don’t be tethered to your computer all day! Use Doceri!


Do you often feel stuck to your little desk sitting next to your SMART Board?  Do you get frustrated when you need to use the document camera, but notice the kids in the back messing around or not as focused as you like?  Do you wish you can show your students what they need to see without always having to be right at the front?  Well, try Doceri- The interactive whiteboard for your teacher iPad!


Doceri “gives you the freedom to teach.”


There have been so many days especially related to Eureka math when I wanted to show students how to work something out, but I had to be glued to the document camera or SMART board..it would drive me crazy.  Then I decided to play with the apps that are available on our iPads and discovered Doceri.  It allows you to take a picture of the document you want and then write directly on it!  If you project your iPad using “Reflector” which is on our computers, then everything can be seen on the SMART Board without actually having to stand at the Whiteboard.  Doceri has become a significant game changer when I want to navigate the room while working.    
See Doceri in action...https://youtu.be/GCyZXw3v4F4

Use Doceri with any subject

Anytime you want show and write on a document for students to see on the SMART board, just take a picture of it within the app and then use the “pen tools” to write directly on it.  This app is even great if you want your students to show their work to the class.  This app offers a lot of options for you to use and learn, but I just use it for writing and displaying.  I also love it because it keeps my students more on track knowing I’m not always stuck in the front.  No matter your tech ability you can use this app smoothly and seamlessly.  If you try it out, please let me know!  If you have questions about how to access this app or Reflector let me know!  I can refer you to the right people.
T.Bossieux.jpg
Tech-ing with a purpose,  
Tiffani Bossieux

We Are AVID Learners!

We Are AVID Learners!

AVID: Advancement Via Individual Determination.  AVID is a school-wide program that helps students be better prepared and ready for college, thus providing them with tools to be successful in school throughout their journey.  However, you do not need to be an AVID school to provide your students with some of these successful strategies. AVID teaches students how to take and use notes, how to ask and answer questions about a text, and includes many strategies that teach students how to think and interact with one another at a higher level such as through a Socratic Seminar and Philosophical chairs (see my previous blog post).  Today, however, I am going to share a few simple strategies with you that you can start implementing in your classroom right away!

Using AVID’s instructional tools will help your students succeed not only by becoming more organized and responsible, but their reading comprehension and ability to think about a text will also increase across subjects. Every teacher and student will benefit from implementing these strategies!


At this point in the year, my students are completely able to read a text and take notes on their own without me telling them how to set up their notes or what to put in them.  They also are able to write levels of questions completely independently and often do so without even being prompted when reading a text.  It’s such an awesome feeling to see them doing these things all on their own!❤

Below you will see my students sharing in partners the leveled questions they created,(here they are doing this through the Kagan Stand-Up-Hand-Up-Pair-Up strategy).  Next you will see they are discussing and answering their leveled questions in their collaborative conversation groups.  At the end of the video, I have included some samples of student work and also some of my anchor charts on Note-Taking and Levels of Questions.


Teaching students how to ask and answer different levels of questions, and take notes in an organized and useful manner is the first place to start in order to aid in student success and achievement! 

Note-taking is based on the Cornell Note-taking system, where your notes are divided into 2 or 3 columns.  2 and 3 column notes are being done even with TK and Kindergartners at my school! I generally structure the “heading” titles for the notes based on the Reading Comprehension skills we are focusing on for that story or text (ie: main idea/details, details/author’s viewpoint, etc). In the video above you can see numerous examples of the different ways I have done 2 and 3 column notes with my 4th and 5th graders this year.  In the beginning, it’s a slow process to teach them how to structure and set up the notes, but once they get it down it becomes like a second nature for them!

Costa’s Levels of questioning and thinking includes 3 different levels. This is how I teach it to the kids:

Level 1: This is a “right there answer.” You have to be able to put your finger on the answer in the text.  For example, “What is the boy’s name?” 

Level 2: These are harder questions both to ask and answer.  Level 2 questions are generally inference based, drawing conclusions, the author’s viewpoint types of questions.  They generally ask to compare or contrast characters, ideas or events.  They can also ask to “explain how” or “ explain why” something occurred in the story.  The students are taught that they will need to find clues in the text in order to answer the question, but they will not be able to explicitly find the answer.

Copy of pic- Megan Brown.jpgLevel 3: I teach the kids that this is the “selfish question” because it’s all about “me.” Level 3 questions often have the reader imagining themselves in the situation, or the character’s shoes and thinking about what they would do, how they would feel, etc.  Level 3 questions often start like “imagine if you were…..” or “predict what would happen if you…” Level 3 questions can also include summarizing a text and making predictions.
Collaboratively Learning,
Megan Brown


Thursday, February 22, 2018

Fishbowl Discussion

Fishbowl Discussion

Image result for fishbowl discussion clipart
Would you agree that holding classroom discussions on a given topic are easier said than done?  This year in particular, I have found it quite difficult to ensure that students participate in classroom discussions.  The first few months into the school year I realized that it was always the SAME students eager to participate.  Similarly, it was always the SAME students that would choose to stay quiet during discussion.  I knew I had to come up with a solution.


“The single biggest problem in communication is the illusion that it has taken place.”  George Bernard Shaw


The quote above really resonated with me and helped me to realize that I really wasn't including everyone in discussion. It was an illusion that communication was taking place but in reality it wasn't happening with everyone. And let’s be realistic, you’re not ALWAYS going to be able to hear from EVERY single student.  However, it was always the same students participating.  I at least knew that something had to be done about that.  What about the rest?  When would I hear from them?

Do you also find that certain students dominate classroom discussions?  How do you modify classroom discussions to ensure that the shy ones also get their voices heard?  Or maybe they’re not necessarily shy but perhaps their reasons for not participating as much is that that they need more time to process their thoughts into words.  

As educators, it is always our goal to create conditions that enable students with various learning preferences and personalities to contribute their thoughts and ideas.  But this isn’t easy!  Check out the link below to see how you can start implementing a discussion strategy that my students and I have learned to love!  It’s called Fishbowl Discussion.

If you click on the following link you will see a fishbowl discussion on why it is important to work in teams. Fishbowl Discussion

Let’s ensure that all students engage and participate in class discussion.  As a step into this direction why not try the fishbowl discussion strategy?


A fishbowl conversation is a form of dialogue that can be used when discussing topics within large groups.  Although many might use it for the purpose of discussing dilemmas/debates, I have found it useful to utilize this strategy in various ways.  We have used it to discuss the essential questions in Wonders, application problems in Eureka, and even to help gather more ideas in writing.  The advantage of fishbowl discussion is that it allows the entire group to participate in conversation.  Several people can join the discussion while others listen.


What does it look like?  Students are separated into an inner and outer circle. In the inner circle, or fishbowl, students have a discussion.  Students in the outer circle listen to the discussion and take notes.  You can preselect those who you want to discuss or you can also just select using equity sticks.  Keep track of those who have been in the inner circle so that next time a different group of students holds the discussion. Or even better, rotate the students around during the discussion so that everyone has an opportunity to talk and to listen on a given topic.


I have found it quite interesting to see that the more quiet students finally discuss.  Even if it’s a little bit, at least they’re voice is now being heard.  They feel more accountable and so this pushes them to participate in discussion. You will also start to see that the more you practice this strategy the less you will have to intervene to facilitate discussion.  Before you know it students will be having a conversation right before your eyes and without much scaffolding.  


I found the following website quite helpful when it came time for me to plan my discussion: Teaching Strategy: Fishbowl. It explains the process of how to hold a fishbowl discussion in more detail. I hope you find it useful too!  

What strategies do you use to help involve all your students in discussion? I'd love to find out!


Inspiring Minds,
Melissa Hernandez

Wednesday, February 21, 2018

Math Journals

Math Journals

Although it’s wonderful that Eureka Math provides us with workbooks for our students, how can we really ensure that they’re studying at home if books are left at school?  What resources do they have in order to be successful with homework?  Internet videos such as the ones found on embarc.online can be very helpful to our students, but what if some don’t have internet at home?  How about if you’d like for your students to have a resource for the following grade level?  The more I pondered these questions, the more I knew I had to figure out a plan b.


With the use of math journals, you can solve all of the problems listed above (at least mostly)!  In no time, you will have a resource for your students to assist with homework and studying, and they don’t even need internet!  Plus, parents and family members can even utilize these notes in order to better comprehend the math being taught in your classroom.  When your kids move on to the next grade level, you’ll feel more confident because you’ll know you gave them a tool to benefit them even once they’re out of your classroom.

My 4th-grade students in years prior used a math journal, but I never really made it as accessible as I would have liked.  When I looked at the 6th-grade student book, I realized that I could turn that book into a math resource for my students.  Since I use Smart Notebook to create my Eureka lessons, I decided to also use PowerPoint simultaneously to generate a math journal/template for my students to use.  I didn’t want to simply produce copies of notes for my students to look at, I wanted their journals to be interactive.

"They say an elephant never forgets. Well, you are not an elephant. Take notes, constantly. Save interesting thoughts, quotations, films, technologies...the medium doesn't matter, so long as it inspires you."
--Aaron Koblin

Allowing our students to be responsible for their own learning and to take charge of being organized and accurate with their math will help in the long run.  Our students need to learn how to use the resources at their disposal because it’s what’s expected of them in the future.  Why not start now?


Here’s the process I use to construct math journal pages for my students:

  1. Look through the Eureka lesson to see which parts are most vital for your students to have a copy of.  Sometimes you might include an application problem, while other times you may want to leave that out.  In 6th grade, students have “Classwork” problems which tend to be too easy at times, so occasionally I leave them out of the notes and we solve in the book instead.  I pick several examples and/or exercises to include in the math journals.  You may also have a lesson that calls for vocabulary to be taught, so I’ll design a way for my kids to acknowledge and practice these words such as through matching, a specific vocabulary template I use, the use of Depth and Complexity icons, etc.
  2. Once you decide what to include in your notes, now it’s time to start creating.  I open up my Smart Notebook and my PowerPoint, so I can easily switch back and forth between the two.  You obviously don’t have to create a lesson on Smart Notebook depending on how you typically teach Eureka. If you do want to create on Smart Notebook, then everything I discuss below would also be copied into your Smartboard lesson as well.
  3. On my opening page, my students are expected to have a heading (name, date, module/topic/lesson #) and a title.  I then take a snapshot of the “Student Outcomes” in the Student Book PDF (in 5th grade and below, you could find this in the T.E. copy which is referred to as Objectives). **If you don't have a PDF of the Eureka module, you'll need to go to greatminds.org and download the module you need. To take a snapshot, simply open up the PDF file, click on Edit, then Take a Snapshot. Now highlight the section of text you’d like to copy, and it will take a snapshot for you.  This snapshot will be instantly “copied” onto your clipboard, but now you’ll need to paste it into your PowerPoint. Before you paste into PowerPoint, you'll want to make sure you click on the Design tab in PowerPoint and change the Slide Orientation to Portrait instead of Landscape.  Here’s an example of the first page of notes both in Smart Notebook and in PowerPoint. The student notes will look like the picture I used at the beginning of this blog.
    Math Journal in Smart Notebook
    Math journal in Smart Notebook.  Students only copy what I've written in blue.

    This is the PowerPoint version which students receive for their math journals.
  4. For 6th-8th grade, simply use the Student Book PDF to take a snapshot of the problem you’d like to copy and paste onto the PowerPoint page you already started.  The problem will go below the Student Outcomes.  If you teach grade 5 and below, you may want to just take a snapshot of problems listed in bold.  Here’s an example of how grade 4 would look.  In the first example, I began my journal with Problem 1.  In the second example, I began with an Application Problem and then inserted Problem 1 below (these are two different lessons).

  5. As I mentioned earlier and in my last blog post, sometimes I like to include vocabulary. If that's the case, it may take a little more work on the teacher's part. Here's an example of something I made in PowerPoint for the students to complete.
  6. After you have your PowerPoint lesson completed, you'll need to print it out and make copies.  Once I have all the copies I need, I use the paper cutter to trim the borders of the notes so that they'll fit in spiral notebooks and composition books.  My coworker, who I share a room with, lets me use her small paper cutter, and it's the best thing ever!  It saves me from having to walk to the lounge daily.  Yes, you could have your students do this part, but it takes FOREVER, and we all know there's no time to waste when it comes to Eureka!
  7. Pass out the notes to your students and set a timer.  Of course, model first how to write a proper heading and how to glue notes down quickly and quietly.  I give my students three minutes, but you may need to start with five in the beginning, especially with younger students.  Sometimes, I play music for the kids as long as they're quiet.  I also hand out stickers for individual sticker charts if students are working quickly but neatly.  This really helps!

And there you have it!  After all notes are glued and ready, we begin our lesson.  The Eureka lesson is still very interactive, and students have a record of everything they did in class!  After we've done an example or two together, I'll have groups or partnerships solve certain problems together in their math journals.  If you find a cool song, chant or rap for the math you're learning, why not paste that into the journals too?  We have many songs in our journals for the students to refer back to.  Math foldables are another fun and useful tool to include in journals as well.

Do you use math journals?  If so, how are they used in your class?  I'd love to hear from you!  Please comment below!  Have a question?  Please comment below or email me at kimberly.smith@omsd.net.

Educating Together,
Kimberly Smith Loya


Monday, February 19, 2018

Project Based Learning - Bumps in the Road


Project Based Learning

"Bumps in the Road"


My thoughts as I viewed my students' data:

Student 1 - got one skill but not the important skills

Student 2 - understands a majority of the material, missed the easy question

Student 3 - computer trouble? two questions attempted out of 6

Student 4 - absent

Student 5 - understanding some of the material but not the essential skills


Image result for data drives instruction


Project Based Learning (PBL) is a method of learning where students acquire knowledge through challenges and inquiry-based learning. One of the essential elements in PBL is key knowledge and success skills.

Projects should be designed around the important CA standards at that grade level so that the key knowledge is embedded into the project. In order to achieve this, it is necessary to break down the key standards that you want in the project and determine exactly what skills are needed to be successful with these key standards. In addition, there needs to be a plan in place before starting the project as to how you are going to assess these key standards. Eureka Math believes in the Data Driven Instruction model where teachers take action, assess, analyze, and then take action again based on the results. The Eureka Math content can be used in the PBL method as both are anchored in the state standards, the focus is on understanding the key elements, assessment is a tool for driving instruction, and re-teaching can be embedded in both.

In addition, success skills should be incorporated into the project to give students success later in life. These 'success skills' are commonly referred to as 21st Century Skills. A well-designed project should have these later life skills incorporated into it - whether it be problem-solving, collaboration, perseverance, or other skills you value as a teacher. The beauty of this key project element is that you, as the teacher, can decide what you want to incorporate into any given project - it can be the same over and over again or it could be a new focus each and every time. You can tailor it to the needs of your current students or you can plan ahead for what skills your students will need at the next grade level.


I just finished a project in 8th grade - "Pokemon Go". The project was designed around the major standard of solving system of equations. Students were asked to choose any three points to write a system of equations in slope-intercept form and solve the system using three different methods. The points chosen represented where their Pokemon was being placed on our campus and the system created was the information being given to someone else to find their Pokemon. There was even a day devoted to a practice run of "Pokemon Go" where locations were set up around campus with their coordinates and students were solving a system of equations going from one location to the next location.

The success skills (21st Century Skills) students were asked to demonstrate was the ability to write their systems into Desmos (the CAASPP graphing calculator) and create a Google Slide presentation to show off their self-created Pokemon and write about their learnings throughout the project. Students had to submit their three system of equations through one graph on Desmos which allowed me to easily see if they created their systems correctly and if they could use the graphing calculator correctly. The Google Slide presentation was submitted through Google Classroom so that I could open each presentation, comment on it, and grade it.

The "bump in the road" came at the end of the project when the formative assessment was given to the students. The assessment was a six-question quiz that covered the essential skills embedded in the key standard. The results were disheartening - after spending four weeks on this key standard I could not prove with the data that the key learnings were mastered by the students. I could offer possible explanations but the end result is that the students did not grasp what I had expected them to grasp when designing the project.

Where do I go from here?

I now start the reflection process (described in last month's blog). Is this project meaningful and relevant? In my opinion yes, but is it meaningful and relevant to the students in the context of "Pokemon Go?" Is it grounded in CA key standards? In my opinion yes, but were there enough checkpoints along the way to raise red flags for me that the content was not being understood? What can be changed to enhance the project? An ongoing question for the moment. These are just a few of the questions that I am currently going through as I process the last project.

I tell you this experience because you may too come to the end of the project (or a unit of study) feeling disheartened. While it is disheartening, we entered this great profession because we each believe that we can make a difference for each and every one of our students. When the results do not show what we expected, then we pick ourselves up and decide what to do differently - but we never give up.

Because that is all the time I have left before CAASPP and this is such a key element in the standards, this isn't the end of the system of equations for my students - but rather a journey that now must be visited and re-visited over the next 30 school days. The question is how I plan on doing this - to be honest, I have not answer but I do know that I am committed to trying again in some other format.

"There are no secrets to success. It is the result of preparation, hard work, and learning from failure." - Colin Powell


I encourage you to take risks with Project-Based Learning in an upcoming unit of study - and if you hit a "bump in the road", then learn from it and do not give up.


Still learning and loving it,
Kevin


Thursday, February 15, 2018

Get the Wheels in Motion


Get the Wheels in Motion

It’s that time of the year again. The state test is only a couple of months away. So, how do I prepare my students to take the test without getting trapped in a fruitless “teaching to the test” cycle? I don’t. I equip them with the tools they need to face the test. I teach my students to think. I help them build endurance. Knowing how to think, to really think, prepares them by default.


Empower yourself with knowledge so you can empower your students to succeed.

Every August, I wonder how on earth these little cherubs will be ready to take the SBAC in April. Holding up one finger at a time I recite the months of the year--August, September, October November, December, January, February, March April. That’s only nine months and that’s not counting weekends, vacations, student absences, and all the other obstacles we have to overcome. Weren’t they just second graders a few months back? The task appears insurmountable.  
        I have exposed my students to the “language of the test” by making it a natural and everyday component of our classroom vocabulary. My students know that support your answer means you need to provide evidence for your position. Depending on the circumstance, that may mean providing textual evidence or relevant arguments. Of course I don’t know exactly what questions will be on the test. But here’s what I do know. The questions will be based on the Common Core standards and those standards are not being kept behind lock and key. We all have access to them. Let’s build expertise so that we can make informed instructional decisions all year long that don’t just prepare our students for “the text,” but for any endeavor they will undertake..


Still spinning my wheels...

Lola Jollie

Sunday, February 11, 2018

Questions

Questions


Have you reflected on the questions you ask during your lessons?  Do your questions increase student thinking?  Do your questions allow students to have deep conversations with each other?  


How do good questions relate to good conversations?
My answers to the questions above are:
-Yes, I always reflect on the types of questions I ask, especially when I ask the wrong ones. That is totally ok.  It happens.
- No, not all my questions increase student thinking.  I find that out after I have asked a question and my students have very little to discuss.  
-When I ask the right questions, YES, my students hold conversations with their partners or groups at such a deep level.  They even begin to question each other!

Good teaching is more a giving of right questions than a giving of right answers. -Josef Albers 

Critical Thinking
I feel it is every teacher's goal to get students to become critical thinkers.  Making sure I ask the right questions has helped my first-grade students think at a deeper level.  As a teacher, it is not easy to ask the right questions but it changes the direction of your lessons when you do.  

The DOK chart above is a tool that can help with strategically planning out questions you want to ask during your lessons.   For example, we recently have read The Gingerbread Man. Here are two examples of how different the conversations would change with a level 1 to a level 4 question:

DOK 1- Who is the hero in this story?
DOK 4- What would happen if the fox did not have any intentions of eating the Gingerbread boy?

Both questions are great, but as you can see, the second question would increase the thinking happening in my class.  The DOK 4 question would allow my students to become critical thinkers.  They would have the opportunity to agree or disagree with each other based on their answers.  

My goal is not to always stick to one DOK level all day long. My goal is to give my students the opportunity and encourage them to find answers on their own.  
Always Learning,
Sabrina Blackwood

Most Viewed Posts