Thursday, December 30, 2021

Trouble-Shooting Kagan: Getting Cooperative Learning to be Cooperative

By Heather Pfrunder, M.A.Ed          SDC Teacher and Education Specialist

December 30, 2021


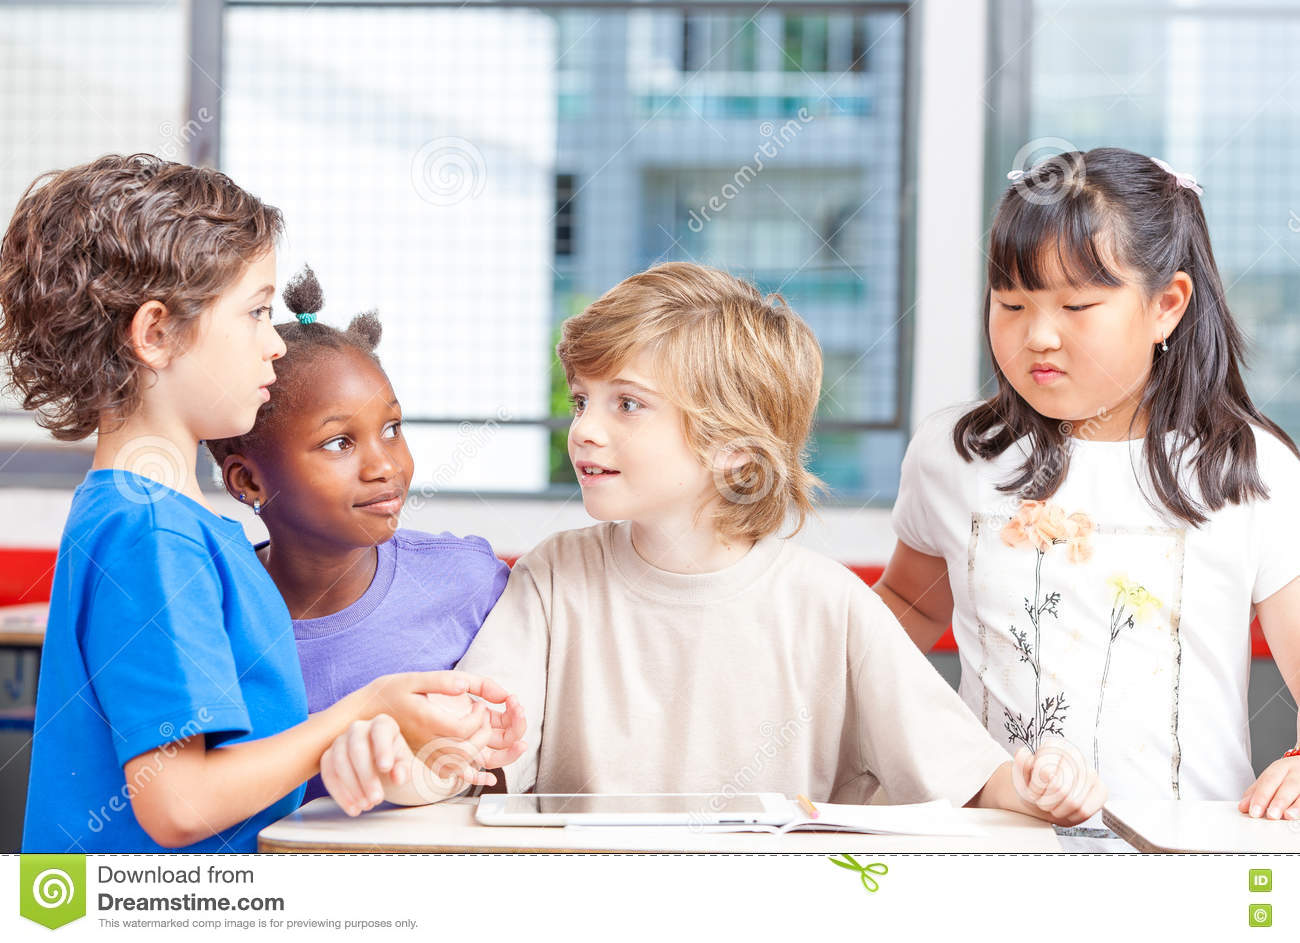
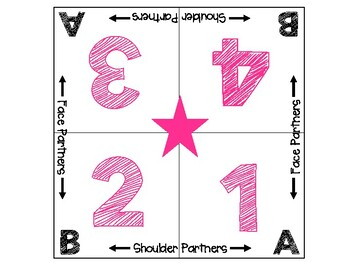
Watching Kagan strategies in action one can’t help but be excited at the level of student engagement.  Student responses which exude inactive reflection and minimal regurgitation transform into animated critical thinking.  The brain science and research behind Kagan strategies is impressive and exciting: it takes in account the varied ways our brain is engaged and uses structures and systems to ensure optimal learning.  Through the practice of collaborative learning, the brain simultaneously is engaged in multiple parts. The social structures form an emotionally safe learning environment, often while nourishing the brain through motion. You could spend a college semester learning all the facets to Kagan and the brain research behind each minute component for it’s cooperative learning structures. However, teachers with fledgling Kagan experience often are encouraged to simply “start with the Robins.” Kinda Techy Teachers on TPT has a great free resource to access visual explanations and how to use the top 5 Robin Structures.


 Click Here for a Free Resource!


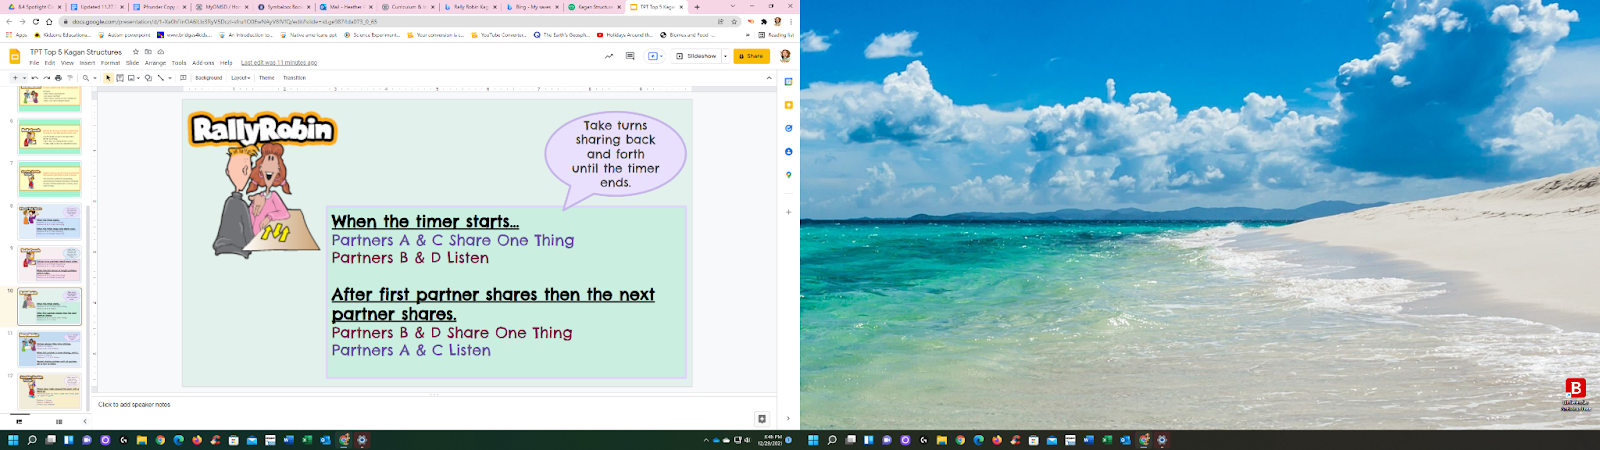
Example of a “Robin” Structure in the free TPT

Resource linked above.


This way teachers and students learn some of the basic structures and can apply them to any subject matter.  It is not the content that is being changed, rather the format of the lesson.  For many teachers the quick diagram of expectations found in the Kagan flip book is simple enough to function for many of their students.


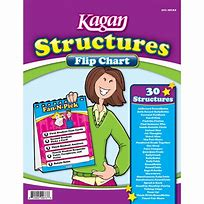
Flip Book page example.


Colleague Randi Muehlen describes many wonderful ways to implement Kagan in her post Kids Love to Talk. However, if we are teaching ALL students, and “all means all,” chances are you have had a student (or three) who are challenged to cooperatively work in cooperative learning groups. In reflection, this challenge happens for several reasons: social skill deficits, academic skill deficits, or a combination of both represented by cognition challenges. So here we go again, my teacher friends!  A list of shortcuts, tips, and printable visual aids to address Kagan challenges is headed your way!  Because honestly, the learning pay-off is so very worth it!


1.Social Skills: In trouble shooting social skills challenges (i.e. silliness, off-task behavior, bullying, shyness…) there are commonalities among strategies to address the different kinds of social skill deficits. Modeling, praise, team reflection, and purposeful team role assignments can shape mal-adaptive behaviors into behaviors that are productive and helpful team-building.  To address the needs of all students you may find yourself rotating between strategies to give all unique students a chance to exercise growth in an area of social skills development. Chapter 11 of the Kagan book outlines Social Skills challenges, solutions, and suggested structures and feedback.  Here is a condensed and shortened list of challenges and solutions for your reference:

 Kagan Social Skills Solutions. Click here!

Social skills are a major component to cooperative learning.  However, often they are a way to cover up another challenge: academic skill deficits.


2.Academic Skill Deficit: In this area there are two key take-aways to address supporting students that may need more scaffolding in order to actively participate with their peers. The first is relatively simple: do your students understand the concepts that they are learning?  Are they able to use key vocabulary in discussions?  For students with unique learning needs this may mean that they may need to use notes with how-to steps and examples or simple vocabulary sheets with visuals and/or sentence frames.  Below are some examples of content vocabulary.


Top: More descriptive vocabulary with visuals to aid in conversation

 for mid-need learners -found on TPT American Revolution Word Vocab.


Bottom: Simple sorting and matching vocabulary for collaboration activities 

for higher-need/less verbal learners - found on TPT water cycle bingo.


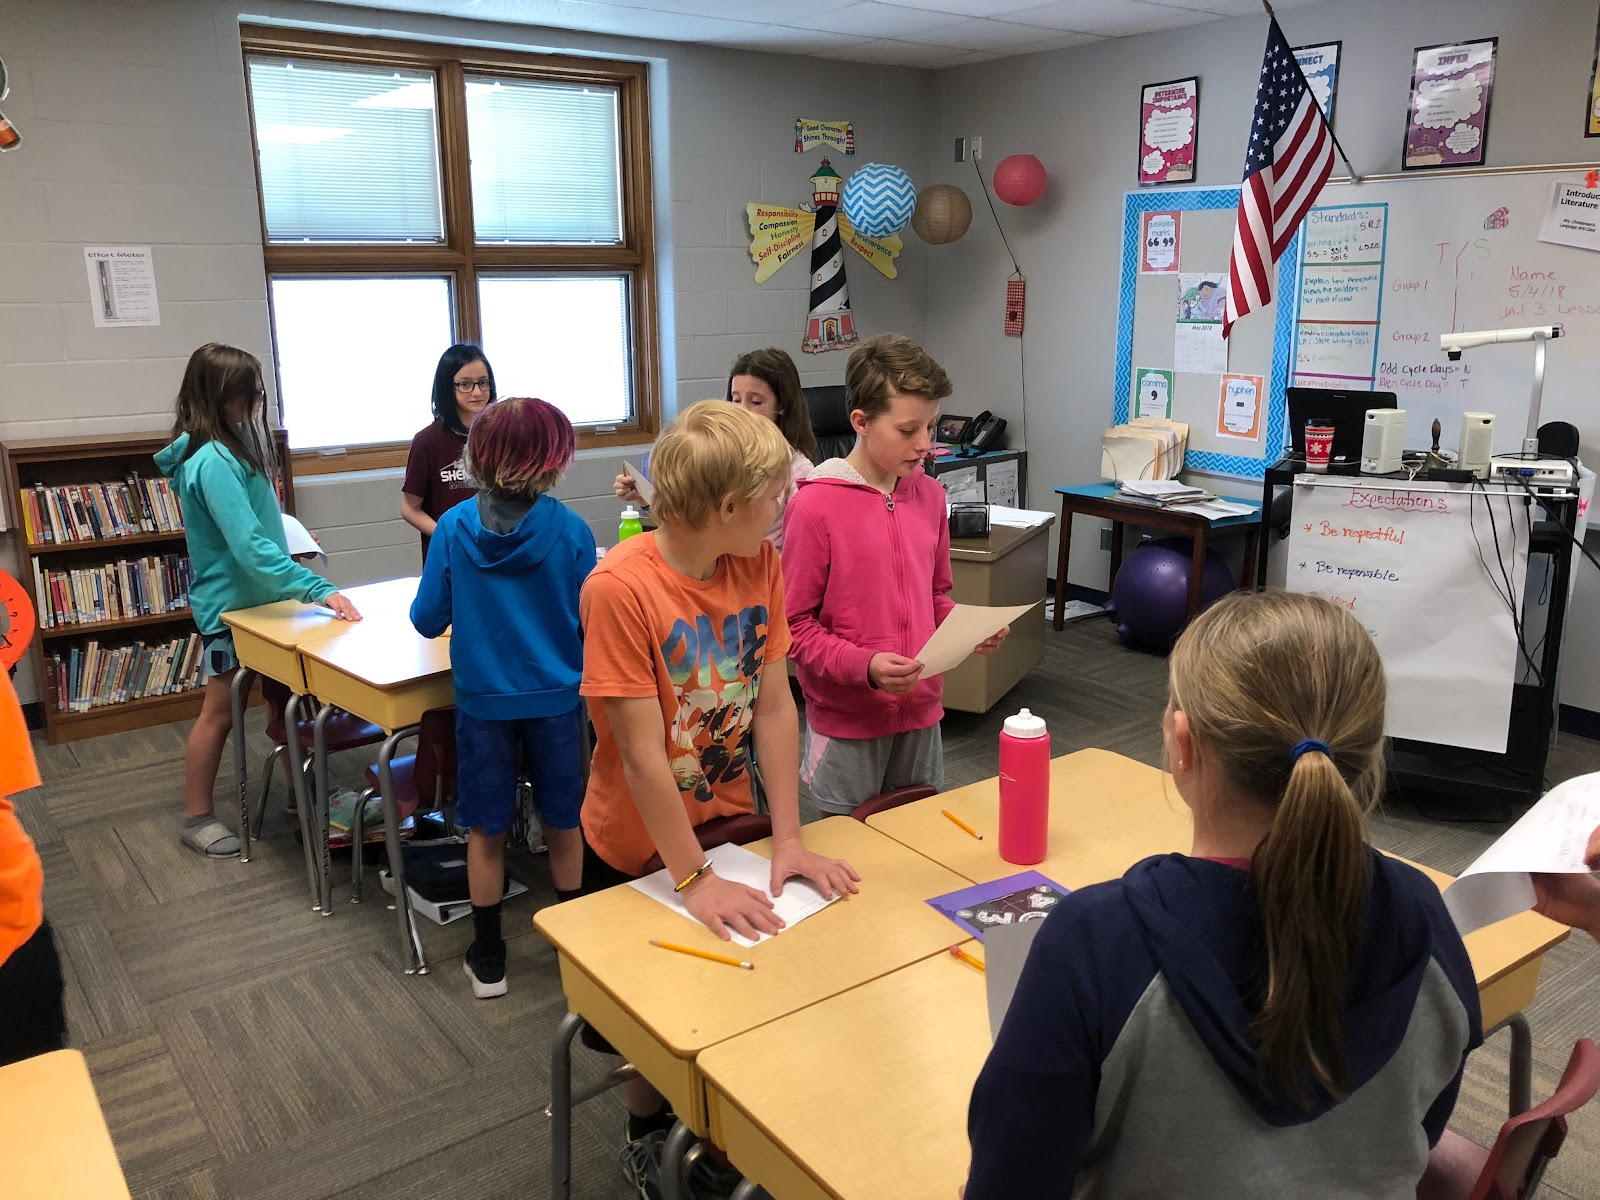
The second scaffold has to do with grouping and “Positive Interdependence.” (This is the “P” in the Kagan acronym “PIES” standing for Positive Interdependence, Individual Accountability, Equal Participation, and Simultaneous Interaction.)  How we set up individuals in groups can either benefit or challenge academic growth. Strong interdependence means that each member of the group is needed for the task to be completed.  This takes careful structuring of both the task instructions (ensuring that each member of the group is building on each other’s contributions) and the careful structuring of groups.  For example, the highest achieving learner typically should not be paired with the lowest achieving learner.  Instead, group your students into 4 groups: high, high-medium, medium-low, and low.  Keep teams within 1-2 levels within their range and assign roles based on strengths and/or needs.  Number and group roles or strengths within numbers 1-4, so that you can make instructional decisions which will work for both the individual and the team.  If individual growth is not happening at the rate you were hoping for and you have adjusted strategies based on challenges, it may be time to mix up groups.


Left: Colorful Crayon Creations has this Kagan structure mat free.  

Right: Students pictured here are working in Kagan Groups. 

Their roles correspond with their numbers.


Kagan Mat Free! Click here!


3.Cognition Challenges:  As a teacher who is charged with the teaching of students with unique learning needs, Kagan can seem daunting.  It is skill upon skill that needs to be taught before groups even come close to true cooperative learning.  For this I have found that starting with simple social skills activities paired with specific structures and visuals create better successes. Think about some of our SEL lessons where we practice celebrating and sharing as individuals.  A simple practice of “Find Someone Who…” is a fun way to practice communication skills (click the link below for the resource from True Little Teacher on TPT).  I would initially have students practice this while seated with a “Face Partner,” but would work towards having students walk and find a friend within a specified area of the classroom (painters tape on the floor is fantastic for setting visual boundaries).

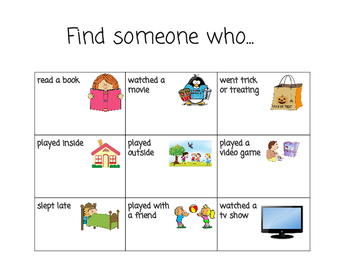
Someone Who Kagan Resource for Unique Learners


Other additional resources for Kagan really have to do with setting expectations and teaching the specific structures.  What does expected cooperative learning look like?  While Kagan uses structures and processes to facilitate learning, it prefers the flexibility of original thought. Afterall, it is the purpose is critical thinking.  However, for learners with higher levels of challenge, processes and expectations need to be specifically outlined for them. To facilitate this I have created a special resource.

Click Here for Adapted Kagan Strategies, Free!!


Being on the look out for what is working (or not) and why is second nature to educators. Simple adjustments will ensure the positive impact of both social and academic learning with Kagan. Until next time, wishing you lots of cooperative learning joy!!


Like what you read? Join me in upcoming blog posts where I continue to put these strategies into place and share resources!


Kagan, S., & Kagan, M. (2015) Kagan Cooperative Learning. Kagan Publishing.

Wednesday, December 29, 2021

New Year! Set Goals!


As teachers, we have goals for almost everything.  
Students should be reading ___ words per minute. 
Students should know ___ letters and sounds by ___.  
Students should know addition and subtraction facts 10, 20 ... by ____.  
The list goes on... These goals may be helpful to us as teachers, but do they mean anything to students?
The answer is often a resounding no.  If students aren't part of the goal-making process, they won't be invested in their learning.   


Students work harder towards the goals they set!

There are many benefits of student goal-setting: students setting their own goals can be mighty and valuable, encouraging them to work harder, learn about themselves, and learn life skills. When students are part of setting their goals for learning, they are motivated to accomplish these goals.

1. Students are enthusiastic about working towards their goals. What better motivation than getting a choice as to which areas to want to improve on? 


2. Sets a focal point. Students need to funnel down a significant goal into smaller attainable goals. For example, reading can be overwhelming because it involves so many facets- decoding, fluency, comprehension, etc. Having students focus on precise goals makes this duty easier to approach.


3. Increase confidence. Instead of sharing a common goal as everyone else and feeling defeated if they fail, students can make individual goals they can meet.  


4. They learn about themselves as a learner. Setting goals can help students learn which habits will make them successful. Students get a chance to find out which practices work best for them and which they feel unsuccessful with as a learner.  


5. You can hold them accountable. If a student isn't working hard, you can remind them of the goal they set for themselves and ask them if what they're doing will help them achieve it.  


6. They learn life skills. Goal setting, planning, reflecting, and problem-solving are all parts of everyday life, and learning to do these effectively will benefit students throughout their lives.  


Students can set their own goals!


It may seem intimidating to think of kindergartners and first graders setting their own goals, but IT IS POSSIBLE with some guidance. It's essential to guide students to set realistic goals. Students also must have a plan to reflect and revise as they learn. To help students understand, I like to use a video game analogy. You wouldn't expect to beat all levels of a video game the first time you play it. But you also wouldn't give up right away, so remember that if you don't have success the first time, think about what needs to change next time. Goal setting looks different depending on grade level and subject area. Goal trackers are a concrete tool to help kids keep track of their progress. They also serve as motivation to keep working hard. They provide a great visual to let kids see how they progress and come close to their goals. Here are some ideas:


  • Goal-setting sheet: Students write out a goal, as well as how they'll take to get there. This will also include the goal date.
  • Post-its: Create an anchor chart for a subject area- reading, for example: Discuss possible areas of improvement and ask questions about which area they can focus on. Students can write their goals on post-it notes and add them to the chart (you can also write for developing writers). It's vital to refer back to this chart to check student growth. You may want to give them a goal sheet to keep as a reminder. This chart can group students by goals and collaborate on ideas to meet their goals.  
  • Goal Slips: I use these goal slips to help my students set goals to learn High-Frequency words. They choose how many words they will know by a specific date. We brainstorm some ideas of how they can get there: study their word rings for 5 minutes a day, work in a small group with me to practice, read their word list nighly at home.


Celebrate! When students have achieved their goals, they need to celebrate and be rewarded. Students earn a certificate of recognition, a prize, and a class cheer. Then they can set a new goal.  


Data- Also, it's important to remember to keep track of all data to help students reflect.


There are so many things students can set goals for-
      • Sight words, letters/sounds...
      • Fluency scores
      • Writing- more details, proper punctuation, adding feeling...
      • Reading more books
      • Doing their homework every night
      • Daily routines
      • Math Facts
      • Behavior management

      As you can see, you can have students set all kinds of goals! Start with one area you want to see student improvement in and work on that first. Don't try to have students set goals for every area. After all small steps are part of goal-setting.  


      Positively Teaching,

      Randi Muehlen

      @positively_teaching

      Tuesday, December 28, 2021

      Digital Learning Log - A Weekly Reflection


      Each summer I come up with ideas of what I want to try in my classroom - some come to fruition and some do not.  One of the things I have wanted my students to do is to reflect on their work - but this reflection time just never seemed to make it into my classroom routine.  I finally decided that I must commit to giving my students time in class to do this and to, better yet, give them a template.

      So, I committed to every Friday giving students time in class to reflect on their weekly work.  In addition, I found a digital notebook that students use (see below).

      To date, this deliberate instructional decision has been really positive - from both a student viewpoint and a teacher viewpoint.  For students, this time allows them to take a deep breath, look a their math work for the week, and make some written statements.  For me, I now must deliberately allow students 15 minutes on Friday to complete their weekly learning log.

      Another benefit that I have reaped from this instructional decision each week is that I learn even more about my students - both mathematically and personally.  Yes - personally as well.  I intentionally ask a question each week that asks students to tell me what they are planning on doing during the weekend.  I have learned so many new things about my students with this simple question - from students going to sporting tournaments to visiting family in Los Angeles to students riding a bull - it is all so great when the following week I can ask students specific questions about their weekend.  Just another attempt to make connections with my students throughout the year.

      A few student samples:


      Natalie - Period 1


      Cristina - Period 2 (Newcomer Student)


      Here is the original Digital Learning Log that I then modified for my classes during the first semester (sorry, I found it through my many Google searches and cannot find the original source at this time - I do know that it was free and when I find the source will update this blog to give credit to the originally creator.)

      Original Digital Learning Log

      I took this resource and modified it so that it looks like this now:

      My Version of the Digital Learning Log

      Students created a copy of my Digital Learning Log and linked it to my original copy so that when I made any changes then their copy also got the changes - big shout out to Ms. Mary-Elizabeth Quan for sharing this skill during a Coaching Collaborative Meeting earlier this school year!  Note:  if you would like to learn this valuable skill, then here is a short 5 minute video that she put together:

      Digital Notebook Linking by Ms. Mary-Elizabeth Quan


      My plan is to continue this practice during the second semester - as I find value in this practice from having students reflect on their work to learning more about my students on a personal level (in a low risk activity).  My hope is that students will value this experience as the year progresses and be able to take what they learn from it and apply it to their studies next year in high school.


      Please reach out if you have any questions or want to come and observe my classroom.


      Give yourself grace during these difficult times and when you have then give yourself more grace.


      Teaching and still loving it,

      Kevin Stott                         

      De Anza Middle School    

      Math 8 & Integrated Math I

      Monday, December 6, 2021

      The Meta-Cognitive Frames of Reference: Taking Thinking Maps to the Next Level (Part 1- The Green Frame)

      I have a confession to make: When I was first introduced to Thinking Maps around fifteen years ago, I was completely unimpressed. I dutifully hung them on my wall and promptly forgot all about them, except on the occasions when I needed to temporarily take them down to make room for art projects. I maintained this insouciance for many years.

      In 2011, I was sent to the Write from the Beginning (The Thinking Maps-based writing program) training offered at the Hardy Center. I immediately found the logical, intuitive structure of the program captivating, and I began to suspect I had missed something important about the bland-looking graphic organizers on my wall. I lobbied my principal for more training on Thinking Maps, which eventually led to multiple visits to our school by an incredibly knowledgeable trainer named Kristin Clark. One of the first things Kristin did was explain the crucial role of The Meta-Cognitive Frames of Reference in the proper use of Thinking Maps, and I eventually came to realize that they were the secret ingredient that unlocked the true potential of the maps.

      The Frames of Reference are a series of color-coded questions that students should always ask themselves about their Thinking Maps (or any other thinking/reading/writing they are doing). Each colored category (green, blue, and red) is a major question, which is then broken into six detailed supporting questions (See the Tree Map below). These questions, in their original form or as content-specific variations, can and should be layered onto Thinking Maps for students to answer before, during, or after they have done the required thinking.


      As you can see in the above graphic, the three question categories are as follows:

      Green: Where did you get the information in your map?

      Blue: What is influencing the information in your map?

      Red: What conclusions can you draw from your map?

      All of these questions will help you address important learning targets and standards across the curriculum. In my next few blog posts, I will cover each one in detail. Let’s start with the Green Frame!


      The Green Frame: Where did you get the information?

      Anyone who has ever administered a performance task knows that this question can make or break a student’s response. If the student is supposed to use a series of sources provided in the task, but instead relies on their prior knowledge, they are finished before they begin. The Green Frame question teaches students to distinguish between two possibilities, posed in the form of supporting questions:

      Is the information based on your prior knowledge?

      or

      Did the information come from a specific source?

      Obviously, the goal should be for kids to contemplate these questions before they begin thinking, but even answering them after the fact can help them build awareness. It is, of course, possible that some of the information in their map could come from their prior knowledge while other information comes from a specific source; an example would be a map of inferences about a story in which the student combines text evidence and prior knowledge. 


      Prior Knowledge

      If the information in a student’s map is based on their prior knowledge, there are a couple of follow-up questions they can use to more specifically identify the type(s) of prior knowledge with which they are working:

      What personal experience have you had with this concept or topic?

      and/or

      What background knowledge do you have that could relate to this concept or topic?

      One of the many aspects of the frames that I love is how they encourage precision of thought. By differentiating between personal experience and background knowledge, these questions lead students to consider exactly where their knowledge comes from. Is this something that has happened to you, or did you learn about it second-hand? 


      The prior knowledge side of the green frame can also be used in writing instruction. Personal experience and imaginative narratives rely heavily on a writer’s prior knowledge, as do the various types of “Explain Why” writing (opinion, point of view, argumentative). Matching genres to information sources can help students create mental templates which can come in handy when responding to writing prompts.


      Specific Sources

      The other side of the Green Frame is perfectly suited to all things Common Core. The guiding question is: Did the information come from a specific source? Our standards are awash with mentions of using and/or citing text evidence. The consistent use of the accompanying follow-up questions is a fantastic way to ensure you are regularly requiring students to employ these skills:

      What are the specific titles, page numbers, web addresses of the sources you referenced?

      and/or

      What specific textual evidence can you cite to support your inferences?

      Needless to say, the use and citation of text evidence are essential academic skills with applications throughout the curriculum. As I mentioned above, the CAASPP performance tasks usually involve the use of specific sources. Many types of expository writing prompts (to Explain Why, to Report Information, and to Explain How) often call for the use of text evidence, and there is even a research grade on our report cards.


      Uses and Examples

      The Green Frame of Reference has become part of my classroom curriculum. In other words, I teach it explicitly throughout the year and it is the inspiration for many mini-lessons. I have even gone so far as to use green font on the maps I create to designate any places where students should consider the source of their information (including the titles of sources, text evidence, etc). 


      Focusing on the Green Frame affords a teacher the opportunity to address important standards in writing, grammar, punctuation, social studies, reading comprehension, and just about any other subject across the curriculum. Students can be taught to use personal examples such as anecdotes, personal experiences, and the experiences of others to support reasons in “Explain Why” writing. Verbs of attribution, along with other language used to acknowledge sources, can and should be taught in conjunction with the concept of citing text evidence. Direct and indirect quotes and their proper punctuation are also logical topics of instruction in this context. In the study of history, sources are everything; the Green Frame questions about citations look like they’ve been pulled from a history class syllabus.


      My reading comprehension strategy and skill maps are often covered with green font. This is my way of constantly reinforcing the need to consider sources of information (See the “Dramatic Structure Summarizing Flow Map” for an example).


      I have an entire wall of my room devoted to the Meta-Cognitive Frames of Reference. This serves two purposes. First, it ensures that I never forget to weave the Frames into my instruction. More importantly, it allows my students constant access to these critical tools. In my next post, I will address the Blue Frame, which is the most cognitively challenging and game-changing of the frames. Please help continue the conversation by including any questions or suggestions in the comment section below!


      Here are the links to my other two posts about the Frames, along with one about the importance of Thinking Maps:

      Blue Frame: https://spotlightclassrooms.blogspot.com/2022/01/the-meta-cognitive-frames-of-reference.html


      Red Frame: https://spotlightclassrooms.blogspot.com/2022/02/the-meta-cognitive-frames-of-reference.html


      What's So Great About Thinking Maps?: https://spotlightclassrooms.blogspot.com/2021/10/whats-so-great-about-thinking-maps.html


      Writing Every Day,

      Eric Lovein


      PS: Check out my post about Summarizing Flow Maps!: https://spotlightclassrooms.blogspot.com/2022/03/thinking-maps-for-fictional-narrative.html


      ...and my video on Circle Maps!:

      https://www.youtube.com/watch?v=vuQ9RkXXZcI


      Sunday, November 28, 2021

      Let's Think Critically!

      How can we encourage our students to think critically in Kindergarten and First grade? As a school, we have been focusing on asking questions that inspire deeper-level discussions. Teaching students to critically think about what they are reading is the key to comprehension and developing the love of reading. In this post, I will discuss how I teach some basic critical thinking skills to my first graders.
      Explaining inference, prediction, cause and effect, and forming opinions to children as young as first grade is really not as complicated as you think. In fact, many of the expected thinking skills are questions that actually come up in natural conversations! I bet you are doing most of this "instinctively" already.  

      So, how can we intentionally ask questions that get our students critically thinking about the books they read/hear?

      I know most of us are already asking questions of our students while reading specific texts. We cannot expect students to just listen to a read-aloud or read a book chapter and just move on. We must challenge and excite their love of reading. We must label what we are actually doing (as far as critical thinking skills are concerned) in our minds and find a way to remind ourselves to ask those types of questions regularly and deliberately. There are many ways to do this, but one way I've been doing this is to keep a list of critical thinking questions close to me as we read. 

      Teaching our students to answer critical thinking questions about stories that are read aloud or that they read is a win-win situation, significantly when you consider discussing these questions with your students, will surely enhance their listening comprehension in general, PLUS they'll be working on their oral language skills too. I always tell my kids that these thinking questions are great because there are no wrong answers, except refusing to try. Think of how much critical thinking goes into asking a student to elaborate by asking "How else could this story have ended? or have them hypothesize by asking "Why do you think the author chose ________ as the villain? or to develop a logical argument by asking "What do you think would have happened if the main character had done __________?  

      It's important not to train your students to get used to one correct answer, and the rest of the answers are wrong. If you are asking a text-based question, this must happen, and you can let students know that this is the case, but when asking a critical thinking question, a creative discussion is what you are seeking. Here is a little trick that I like to use when one of my students says they don't know the answer. Just say, "If you did know, what would you say?" It's so important to relieve students of thinking they always have to get the answer correct.  


      Where do I begin?

      It can be overwhelming to teach and then ask these critical thinking skills to young children. If you teach it at their level and break it down into parts that they understand. I like to focus on one skill at a time and ask one excellent question instead of many questions that can be confusing.  

      Let's look at how to break down some critical thinking skills:


      1. Hypothesis- I tell my students to take a really smart guess based on what they already know.  

           -Why do you think foxes and wolves always seem to be the bad guys in a story?


      2. Develop a Logical Argument- Tell me why you believe something is true, and really think for a minute because I will ask you to tell me a lot about why you think so.  

           - What do you would have happened if the characters in the Mitten if the mouse had not decided not to go inside the mitten? Do you think the mitten would have popped? Tell me more...


      3. Predict- What do you think will happen next? 

           - David just broke the vase with his baseball bat. What do you think might happen next? 


      4. Cause and Effect- I teach my students the cause is what started it, and the effect is what happened.  

           - What made the _____ _____? What happened then? 


      5. Infer- Look at the picture, and tell me what you think is happening and why.

           - Have your students use the illustrations to tell what happened and how they think this happened.


      6. Connect Text to Self- Has anything like this ever happened to you? 

           - The little bird is sad because it does not know where its mother is, and he feels lonely. Have you ever felt lonely? 


      7. Evaluate- Decide whether or not something was a good idea or a bad idea. 

           - The children let the Cat in the Hat in the house when their mom was not home. Was this a good or bad idea? Why or why not? 


      8. Draw Conclusions- Think about the WHOLE story and tell me what you think.  

           - Is this story real or make-believe? Why do you think so?


      9. Compare and Contrast- Tell me how these things are different. Now tell me how they are the same.

           - Look at the carrot and the pumpkin. How are they different? How are they the same?


      10. Form an Opinion- How do you feel about this? Do you like it? Why or why not? 

           - Did you like this book? Did you not like this book? Why or why not?


      Please email me with any questions or if you'd just like a buddy in wrapping your head around questioning. I'd love to learn with you!


      Positively Teaching,

      Randi Muehlen

      @positively_teaching

      Most Viewed Posts