Friday, March 4, 2022

Don't Forget about Independent READING!

Who doesn't want to create a classroom of lifelong readers? Our most important responsibility is to teach ALL students how to read. Students need guided reading but it is crucial that they also get independent reading in all grades. Many studies have proven a link between time spent reading and reading achievement. The more children read, the better their fluency, vocabulary, and comprehension. I understand that some worry that it is a waste of instructional time and fear that our struggling readers aren't reading and only need small group instruction. Yes! I believe in the power of small group instruction- it works! But, I also see value in independent reading. Independent reading is a time students can practice and apply a wide variety of reading skills within the text. This practice helps students build strong habits that will support them in and out of the classroom.  


What are the benefits of Independent Reading?

What is independent reading?

Independent reading can simply be defined as students reading on their own. Students choose to read materials they want to read for pleasure or gain information about a particular topic.  
Independent reading is where “the train meets the track.” It’s an opportunity for students to practice all that has been taught during phonics and guided reading. Independent reading improves comprehension and helps students develop their vocabulary. Also, independent reading can improve fluency by allowing students time to practice reading the skills they have learned. 

As a first-grade teacher, I teach reading instruction using the "I do, We do, You do" model. This means direct instruction of skills and plenty of practice applying these skills. Independent reading offers the opportunity to practice and apply the skills you have taught them independently. Application at its finest! We all know that some will struggle. We must find ways to support them. Some oppose independent reading for our lower readers. But, why can't these students practice independent reading after they've been exposed to text in reading instruction or a small group? We need to give all students the chance to apply the skills we've taught them. Independent reading gives students time to practice the "I do".

The most important benefit of independent reading is developing a child's love for reading. I understand that having a student read independently will not necessarily foster a love for reading right away, but perseverance and motivation will. Students become motivated to read when they start feeling successful and confident. If we surround students with books that reflect their interests, it will motivate them to improve their reading. My students are excited to read books that they connect with or relate to. These connections help improve their comprehension. This independent reading time gives students time to explore topics they enjoy or maybe they've never learned about. It leaves them excited to learn and read more.


How can I keep my students accountable during 
Independent Reading Time? 

1. Explicitly Teach Procedures and Routines for Independent Reading- 
As with all things in our classrooms, we must teach our students what we expect. 
I teach independent reading strategies just as I teach my students to write a paragraph or solve a math problem. I show them what I expect and have them practice it.
  • “Today, I’m going to teach you how to _______. Watch while I ______.”
  • I demonstrate the desired behavior. (Example: sitting at a desk with eyes on the book.)
  • I call on students to model the desired behavior.
  • I asked the students to comment on what they were doing.
  • I invite a student to demonstrate what NOT to do.
  • I invite one last student to model proper expectations again. (Ending on a positive note.)

Break things down into Minilessons-
I don’t model everything all at once when I model independent reading. I break it into different minilessons:
  • How to choose books that are best for them
  • How to treat books respectfully
  • How to begin reading during independent reading time
  • How to create a story from the pictures (for Kindergarteners who cannot yet decode)
  • How to learn from the photographs of nonfiction
  • How to retell a story you know
  • How to gain information from the pictures and text features in books
  • How to show respect to your reading partners
  • What to do if a reading partner is bothering you
  • How to keep your books in a bag or box
  • How to use the classroom library
  • How to choose books that you enjoy reading
  • How to reread books for fun
  • What to do when finished

For several weeks, I teach quick lessons almost every day that focuses on one of these aspects, and then students practice reading independently. Remember, even after your students understand what to do, continue to reinforce your expectations each day. Yes, daily! Every day before they have their independent reading time, review a few routines and expectations. 


2. Allow Students choice, BUT Provide Guidance- 

It's important to allow students to select their own books based on their Lexile if they have one. Our students in the First Grade Benchmark and Challenge Universal Access groups have a Lexile. I have books for students who score a number and BR. I provide my strategic and intensive students a choice of select BR books and phonics-based readers based on their ability. If you are using decodable passages for instruction, you can include copies of those passages as a choice. This ensures students have texts that help them feel successful applying the skills you have taught them. Eventually, my students will select books from the classroom library to match their Lexile score. In the beginning, I provide them with books to choose from. They still have a choice, but I give myself time to thoroughly teach them how to use the classroom library.


3. Promote different ways of Reading-

Our students must view themselves as readers, even if they aren't reading words yet! I take time to teach students different ways to read a book, including

  • Reading the pictures and making up a story. 
  • Retelling a story, I already know- I read TONS of repetitive books and familiar fairy tales in 1st grade so that students can pretend-read these same books to themselves.
  • Learn from the pictures or photos- There is so much that students can learn from looking at the images in informational text!


4. Gradually Build Stamina-

As you already know, it's so important to start out small in the beginning. I usually give my first graders only 3 minutes of independent reading time initially. Every week, we add on a minute until we reach our ultimate independent reading time goal. I usually stop at 15 minutes in first grade. Stamina building can start at the beginning of the year, yet remember you still have an entire school year ahead of you. As your students grow and change, you will extend the amount of time that they read independently. From a worrier who wants to get everything done ASAP, I'm telling you to grant yourself some grace if your students are not quite where you would like them to be even after weeks of practice.


5. Track and Celebrate Progress-

You might create a bar graph to chart how many minutes students read independently daily. This is an excellent tool for students to visually see their progress.


6. Motivate students with sharing time- 

At the end of independent reading, I allow a few minutes of sharing time. During share time, students can share a favorite picture or part of a book with a partner or share something that they wrote on a sticky note. It can be hard to carve out share time, but I think it's so helpful in motivating students to stay on track during independent reading. It also creates opportunities to make comments like, "I hope you are finding something interesting to share with your partner!" when you notice an off-task student. Start simple at first. 


7. Provide Positive Reinforcement- 

I'm constantly pointing out students' excellent behavior, including during independent reading time. Students read independently, observe behaviors, and take notes of great things you see them doing. You never want to interrupt your students' actual reading time. But as students are getting started, I say things like: "I see Charlie already opened his book and is reading—wow!" or "Ryan has a book and is ready to start." After independent reading time, I name a few students and the positive reading behaviors displayed during independent reading time. I also love to take photos/videos of students who are following my expectations and show them after independent reading time is over!


8. Treat independent reading as something to value-

We have to teach routines and expectations to help our students build stamina. However, we also have to encourage our students to WANT to develop their reading stamina in the first place! Before I ever begin teaching expectations for independent reading, I take time to tell my students why I love reading, ask them what they love about reading, and build excitement for all of the wonderful stories we will read during the school year.


I hope that what I've shared will help you feel confident about the choice to give your students independent reading time each day. Protecting this time is a meaningful way to support your students' love for learning and build strong reading habits that they will carry with them forever.


Positively Teaching,

Randi Muehlen

Monday, February 28, 2022

Anchor Charts - Supporting Student Learning


My students often struggle with having past information readily available when they need it.  They have notes that they keep but having easy access to information would make their class time more productive.


Do you wonder how you might provide students with easy access to information?

Do you have students who just need a quick visual clue to help them move through a problem?

Do you have students who not organized enough to find the notes you just gave them yesterday?


I answer 'yes' to all of these questions and so this year the Math 8 Team that I am part of decided to create anchor charts that we hang from the ceiling.


Here are some examples from our last unit of study - special shout out to Mrs. Nelson on our Team who creates each of these for us:


The greatest value I have found in using anchor charts is the easy accessibility they are for each of my students.  For me, it is so cool to see the eyes of students go from the work on their desks to looking up to the ceiling and just seeing the 'lightbulb' go on in their head.  All ranges of students access them throughout the unit of study - there is not a single student in my class who at some point does not glance up at them.

Students still have access to their notes but these anchor charts have provided another level of comfort for students in a subject area that many struggle with at some point during the year.


Consider how you are supporting your students through a unit of study - either through notes, videos, etc. - and how anchor charts might augment what you are already doing in the classroom.


Again, I realize that the times we are in are tough and this might not be the year to implement this idea but consider putting into your teacher toolkit for a year that is more normal.

Give yourself grace during these difficult times and then give yourself more grace.


Still teaching and loving it (everyday),


Kevin Stott                                           

Math 8 & Integrated Math I                 


Assessing Spring Assessment Readiness

By Heather Pfrunder, Doctoral Candidate, SDC Teacher, and Education Specialist

February 28, 2022


Assessment ready or standard’s ready? Are we making students ready for life by maximizing instructional minutes? Often the answer is yes. During testing season it seems like the answer is… well… testing. However, if we address metacognition skills with test preparation, our students are becoming equipped with learning to perform under pressure.  Let’s look at how.


  1. Spiral Review and the Standards.


While the first objective seems pretty obvious, it really piggy-backs onto my previous article about maximizing spring growth. In a year with so much change, transition, and re-learning educators have had to rethink lessons into spiral review formats. Assessment prep is simply one more tool to refine this practice. Taking time to review objectives and test formats informs instructional minutes, especially during intervention periods. Looking over the practice test questions and formats are not only for students, but a great tool for educators in knowing how to prep students.


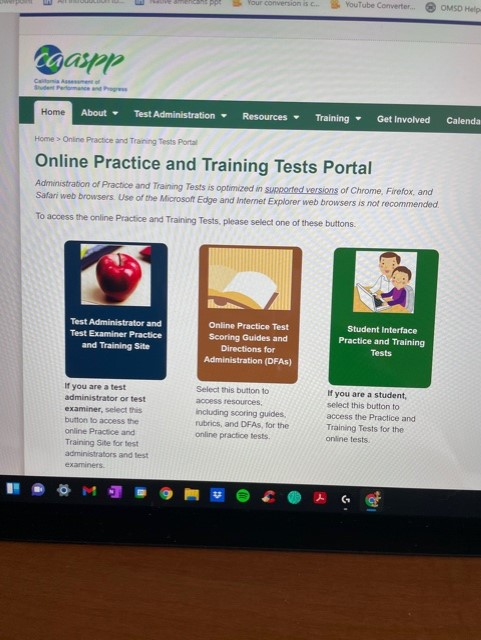
In the caaspp website teachers can review tests 

and set students up with practice test opportunities.


  1. Mindfulness and Testing


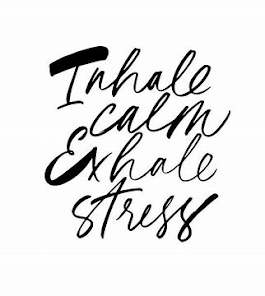
Slowing students down to breathe and focus on clarity of thought is the first step to effective test-taking skills. It also replicates needed life skills. From driver’s tests to college exams to employment tests, much of what we do in life is dependent on effective test-taking skills. Practice breathing and focusing on the question or the topic. Practice will assist students with more effective management of their emotions. Controlled breathing is a good base of ensuring heart-rate and oxygen to the brain. As a daily specific practice before practice testing, we are setting students up with a natural association of calming and test-taking strategies. Practice videos are available in our SEL toolkit, or simply click this link here.

  1. What is the question asking?


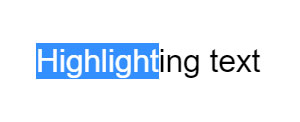
Really? Yes, really. So often in their anxiety or eagerness to quickly complete the test students forget to go slowly and really look at all the keywords of the test. Just as we expect our students to circle, box, or highlight answers, it is equally important to circle, box, or highlight key words and compare answers to the questions. While several words are bolded and underlined by caaspp, students can practice using the mousepad to highlight additional question details. An additional effective test-taking strategy is to look at the questions before reading the passages, when allowed.


Have students practice using their mouse or keypads to 

highlight key words in questions and in the text.


  1. What tools do I use?

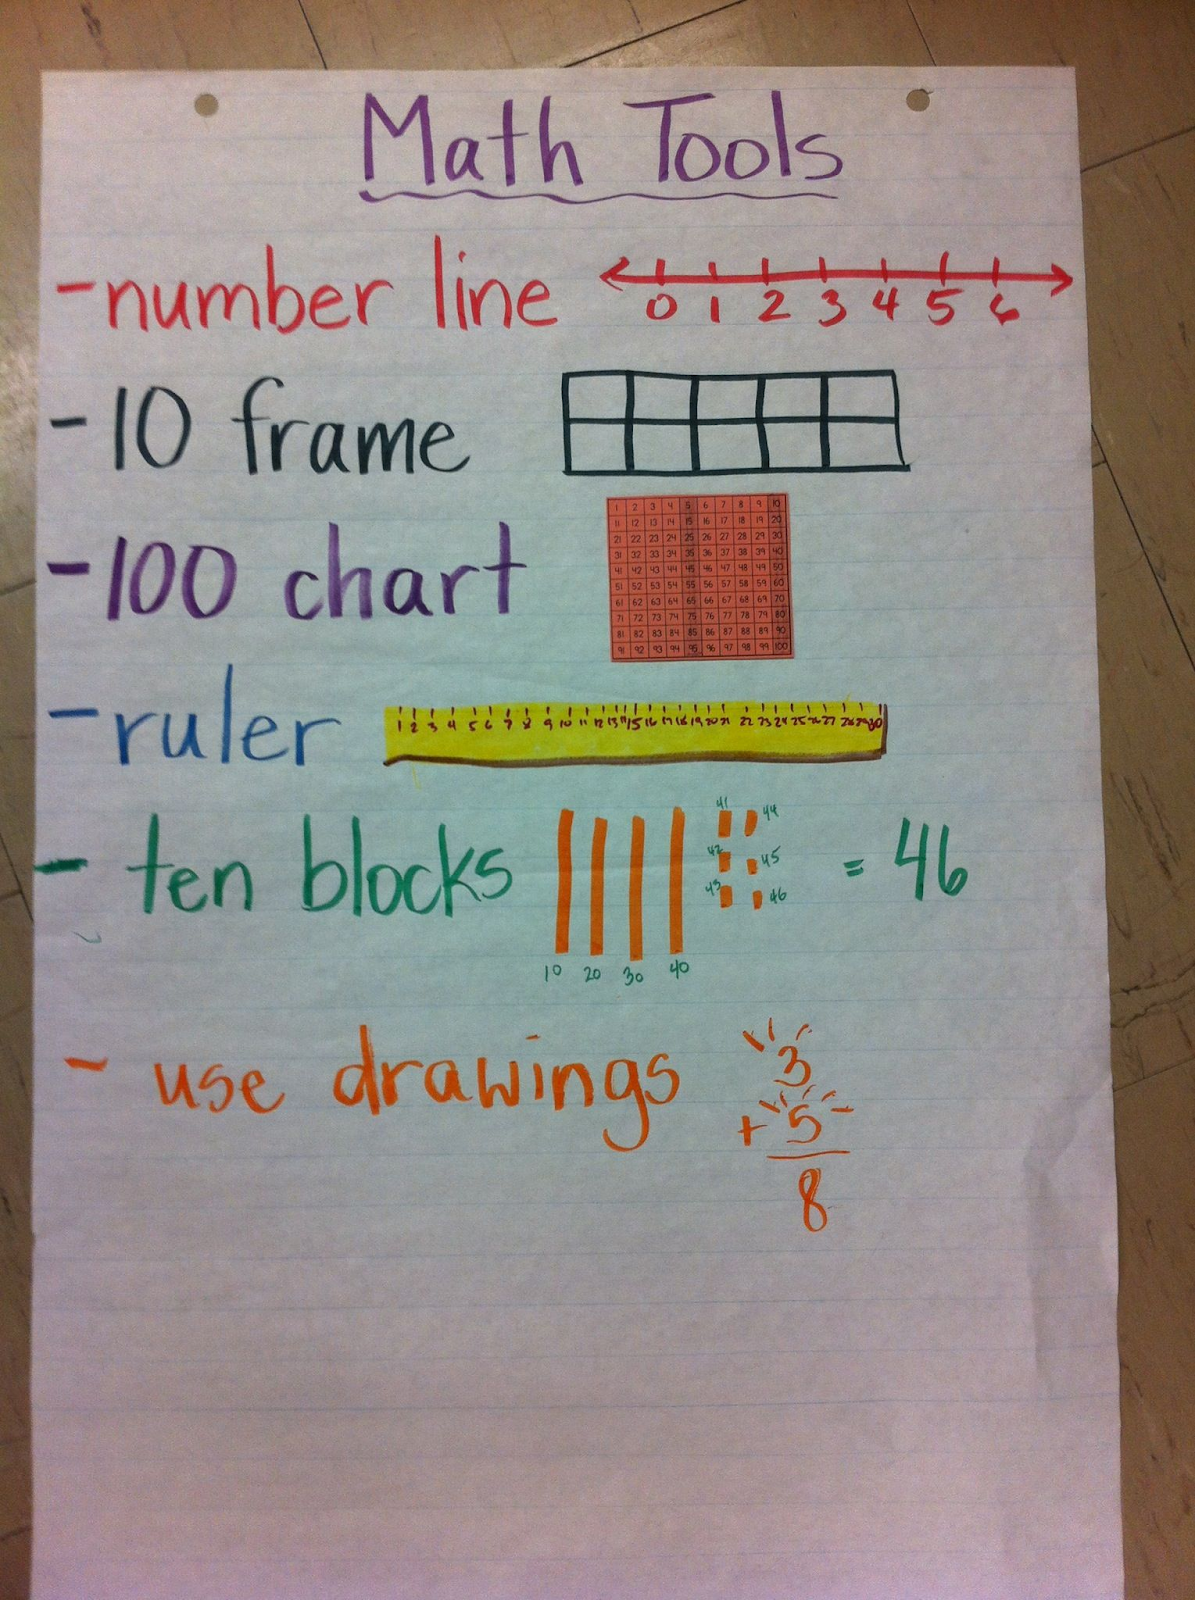
Chances are if your students aren’t using tools, they really are not answering to the best of their abilities.  Simple things like thinking maps on paper or using an allowed 100’s or multiplication table can make the difference between making senseless errors and demonstrating true abilities. Do not assume that months of “Read, Draw, Write” or “STAR” note-taking means they will automatically use these tools in a testing environment. When you practice pre-testing observe: do your students use the tools, or do they know how to make their own? If pencil and paper are allowed for scratch paper do they know that they can draw a simple number line to add and subtract? Having students practicing these skills prior to assessment not only means that they have strategies for test-taking, but they are able to practice problem solving skills for daily assignments. Sometimes a little explicit instruction is just the boost your student needs.


If digital tools are not available, have students practice creating their own.

Practice using pre-writing strategies they have been practicing.


Until next time, wishing you the best and may your students’ testing odds ever be in their favor…


Like what you read? Join me in upcoming blog posts where I continue to put these strategies into place and share resources!


Monday, February 7, 2022

The Meta-Cognitive Frames of Reference: Taking Thinking Maps to the Next Level (Part 3- The Red Frame)

Note: This is the third in a three-part series on the Metacognitive Frames of Reference. If you missed one or both of my previous posts, it would be helpful to take a look at them before proceeding with this one. Here are their links:

https://spotlightclassrooms.blogspot.com/2021/12/the-meta-cognitive-frames-of-reference.html

https://spotlightclassrooms.blogspot.com/2022/01/the-meta-cognitive-frames-of-reference.html


The Red Frame: What conclusions can you draw?

While I still maintain that the Blue Frame of Reference can make the biggest impact on instruction, I suspect many readers will find the Red Frame to be the most immediately useful. This is due to the sheer number of Language Arts standards that can be consistently addressed through its use. The overarching question is:

What conclusions can you draw from your map?

According to Comprehension Strategies for Constructing Meaning, “drawing conclusions is inferring from text clues,” as opposed to a combination of text evidence and prior knowledge (pg. 131). Therefore, drawing conclusions from information in a thinking map involves inferring general theories, principles, or statements from the map’s component parts. A major theme of this blog post is how influential the Red Frame is on students’ writing, but let’s face it, not all of your daily assignments get taken to a full-blown written response. In these cases, embedded Red Frame questions provide students with opportunities to reflect on the conclusions they have drawn from their learning and thinking with quick constructed responses. The maps I produce for my students across the curriculum are replete with Red Frame questions because they are always relevant, regardless of the content of the map. Let’s investigate each guiding question in detail.


So What?

The left side of the Red Frame begins by asking:

So what is the main idea for the information in your map?

Within the Thinking Maps program, this is referred to as the “So what…” question. In Write from the Beginning, students are taught that the answer to this question should form the basis of the opening sentence or paragraph in a piece of expository writing, and it isn’t hard to understand why; if the reader knows the main idea of an essay from the start, it is much easier for her to comprehend how the various parts of the essay fit together. 

Of course, as the aspiring author of the aforementioned expository essay, a student won’t (and probably shouldn’t) always know what the main idea of her writing will be at the outset; this is where planning with thinking maps comes into play. If she is busy researching a topic, collecting scientific data, or applying a reading comprehension skill to a piece of literature, she likely hasn't had time to do the inductive reasoning necessary to piece her accumulated thoughts and information together in her head. Recording this information on an appropriate thinking map can go some way to solving this problem; this is because the structures of most of the maps will force (in a nice way) the student to consider how ideas and/or information relate to each other. However, even if she has done a beautiful job of completing her map, there remains work to be done; the main idea must still be determined. Let’s examine how Bloom’s Taxonomy can contribute to the achievement of this goal.

I believe that, if we are going to ask students to think, we should be precise about how this should be accomplished. It’s all well and good to ask them to find the main idea, but how in the world does that work? If the main idea of a map involves higher-level thinking, then some serious analysis is likely in order, and that is going to require scaffolding.

Differentiating:

The Revised Bloom’s Taxonomy breaks the “Analyze” level of cognition into three progressively more complex steps. The first, “Differentiating,” requires students to distinguish between relevant and irrelevant information. In the case of a thinking map used to plan writing, this involves selecting researched information, collected data, text evidence, or prior knowledge to be placed on the thinking map. 

Organizing:

“Organizing,” the second step of analysis, entails determining how information fits within a structure. This is the aspect of cognition most blatantly encouraged and supported by thinking maps. The five “Text Organization Structure” maps: Double Bubble, Tree, Brace, Flow, and Multi-Flow possess implicit structures. For instance, if using a Double Bubble to organize a compare and contrast essay, the student will know that relevant pieces of information are topics, similarities, differences, or points of comparison due to the design of the map.

Attributing:

This leads us to the third and final step of analysis, “Attributing,” which the Revised Bloom’s defines as, “determining a point of view, bias, value, motivation, or intent underlying presented material.” Many of these terms may sound like they belong in the Blue Frame, but if any of them constitute the main idea of a map, they can also serve as answers to the left side of the Red Frame. 


The maps below have been labeled (in purple) to show how each part relates to the levels of analysis. The prompts in the smaller boxes help the student “Differentiate” between relevant and irrelevant information. The structure of each map guides the student through the “Organization” process. The big boxes on the right of each map contain prompts that will help the student “Attribute” the thematic concept and statement while simultaneously reminding them to work through the first two levels before doing so.


Thematic Statement Dual Left-Sided Partial Multi-Flow Maps


Of course, there will be other times when the main idea of the map is far more straightforward, if not totally obvious. If the student has completed a tree map about the three types of rock, the main idea should not require any deep analytical thinking. Such situations fall within the “Understand” level of Bloom’s Taxonomy, which makes sense since the first guiding question on the left side is:
So what do you now understand about this concept or topic because of the thinking you have done?

The second guiding question asks:

So how would you summarize the main idea of this information?

This is essentially just another way to prompt students to consider the main idea. Summarizing, as both a reading strategy and a possible response to the Red Frame, will be the topic of my next blog post, so I will leave it there for now.


So why? 

The right side of the Red Frame asks the brilliantly simple question:

So why is the information in your map important?

It might not seem like earth-shattering stuff, but I must say this question has had a huge impact on my writing instruction because its answer can always serve as the basis of a student’s closing sentence or paragraph. When I was a kid, I was usually told to restate my introduction in my conclusion—so boring! The “So why…” side instead invites the student to consider one or both of the following questions:

So why is this information important to you?

and/or

So why is this information important to others?

Not only will these questions elicit more interesting conclusions, but they also encourage students to connect their thinking to the real world. The Write from the Beginning Expository/Informative writing manual has a wonderful section on the importance of hitting “triggers” in the closing paragraph of a point of view essay. Triggers are subjects that will be of potential interest to most readers. Saving or making money, serving as a role model, guaranteeing the safety of loved ones, saving time, improving one’s health, promoting equality, and improving children’s educational opportunities are all good reasons for readers to care about an author’s point of view. Many of these triggers can also apply to other types of expository writing.


Uses

The Thinking Maps program recommends teaching students to write their answers to the “So what…” question at the top of their maps and their answers to the “So why…” question at the bottom. I tend to put all of my Frames questions at the bottom of a map because I’m a rebel. In most instances, I like to customize Red Frame questions to the particular digital map. As you can see in the “Protagonist/Antagonist Double Bubble Map” below, I have asked a question from each side of the Red Frame that pertains to the reading comprehension skill being addressed, but in a pinch, you can always just pose the questions in their original forms.


I hope you have found my series on the Frames of Reference helpful. I would love to respond to any questions or comments you have in the section below!


Always Writing,

Eric Lovein


Friday, January 28, 2022

Springing into Action: Maximizing Spring Growth

By Heather Pfrunder, M.A.Ed, SDC Teacher and Education Specialist

Jan 28, 2022


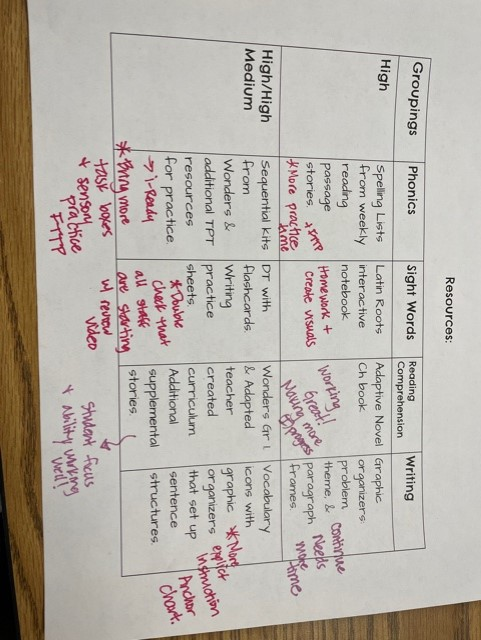
Post Winter Break is always the most exciting time of the year.   Students are in the FLOW of learning; all the pesky practices of getting used to the routines are out of the way and we simply get down to the business of learning.  It’s the time where we often see the bigger payouts for our efforts and strategies. It is also the time that can quickly get sandwiched between assessments and special projects.  However, careful attention to student progress monitoring can be the difference between meeting student goals/standards and leaving learning roll-over for summer school or the following fall. So, let’s get to it in three steps!  The following link is the organizer I have created for use.  Classroom Monitoring Worksheet How to use it is below.

**(Note: you will need to make your own copy of this document to edit it).


Step 1: Survey Student Skills

The first step seems the most challenging, but simply look at assessments and class work.  Summarize what you see and what you know from interacting with them.  Cover each basic aspect, where are they at? What objectives are they working on?  The sample I chose from my classroom is as follows: ELA: Phonics (or spelling), Sight Words (or Latin Roots), Reading Comprehension, and Writing.  For Math: Algorithms, Measurements & Graphs, Fractions & Decimals, Geometry, and Word Problems.  This may look different for your grade level or your teaching subject. Tweak what you need adjusted to match state standards and goals from your class/subject.


Step Two: Re-Organize Your Intervention Groups.

Students grow and their needs shift through the year.  Being responsive to that means that you are placing them in a place where they can collaboratively work and grow.  In the image above I have separated my students to look at what work I need them to accomplish.  However, knowing that some students may have difficulty interacting with particular individuals means my students will be regrouped differently despite ability - thus the penciled info!  Revisions are in progress!


Step Three: List and Review Your Resources

Listing out your current resources helps you to frame that every need is covered.


 The important part is reviewing what is working and what is not.  What could use more attention?  Why?  More interactive lessons?  More practice?  A different program or strategy?  Maybe time needs to be shifted to a particular skill.  Here I have added notes about more intervention time with Fast Track To Phonics, videos, revised anchor charts, homework opportunities, and notes to myself of what is working great (i.e. consistent progress at an appropriate pace). Now, it’s lesson planning time. 


Wishing you and your students AMAZING Spring Growth!!


Like what you read? Join me in upcoming blog posts where I continue to put these strategies into place and share resources!


Tuesday, January 11, 2022

The Meta-Cognitive Frames of Reference: Taking Thinking Maps to the Next Level (Part 2- The Blue Frame)

Before proceeding with this blog post, I would like to quickly address a possible misunderstanding. While it might seem to the reader that I believe the mere use of Thinking Maps will cure all that ails us in public education, nothing could be farther from the truth. Instead, I see Thinking Maps as blank canvases on which to neatly and efficiently bring together a diverse set of pedagogical theories and techniques. It just so happens that some of the many “paints” that can be applied to these canvases are the Meta-Cognitive Frames of Reference questions, which were, of course, developed by the Thinking Maps company (Sorry about the lame extended metaphor!). Eventually, this blog will delve into many non-Thinking Map ideas such as Gradual Release of Responsibility, Historical Thinking, Bloom’s Taxonomy, Collaborative Structures, Intellectual Virtues, and Literature Circles. My point is that Thinking Maps, when used to their fullest potential, allow me to layer some or all of these wonderful tools into a single, easily digestible graphic. Okay, on with my discussion of the Blue Frame!

Whereas the Green Frame of Reference asks students to consider the relatively straightforward question of where they got their information, the Blue Frame involves the much more cognitively challenging issue of what is (potentially) influencing that information. The implications of this question are powerful and far-reaching. It is one thing to know information came from a particular book; it is another thing entirely to understand how the information in the book has been influenced by its author’s point of view and the social and historical contexts in which it was produced.


The Blue Frame: What is influencing the information?

To paraphrase Dani Rojas, The Blue Frame is LIFE! 

My guess is, if you ask the average (cool) teacher about her hopes for her students, you won’t hear much about scores, grades, or points. Instead, you will likely hear terms like empathy, perspicaciousness (assuming said cool teacher has a sweet vocabulary), lifelong learning, social and emotional intelligence, cultural sensitivity, and so on. It is my fervent belief that the Blue Frame is one of the most potent tools at your disposal in the struggle to achieve these noble goals. Oh, and it will also, magically, improve your students’ scores, grades, and points simultaneously. I am so certain of this point, that I suggest you start worrying less about how to incorporate the Blue Frame into your curriculum and more about how to incorporate your curriculum into the Blue Frame. Put another way, if you can teach your students to consistently identify and consider the points of view of themselves and others, recognize bias, distinguish between types of sources of information, and perceive the influence of historical and social issues on those sources, you have won my friend!


Point of View

As with the other frames, the Blue Frame is divided into two main guiding questions, the first of which is:

Is a specific point of view influencing the information in your map?

As I glance around my classroom, I see the term “Point of View,” or its synonym “Perspective,” just about everywhere. Here is proof:


The reasons for the ubiquity of these terms should be obvious, but in case they are not, here are a few (or more!) to ponder:

  • In literary analysis, students need to learn to discern the points of view of characters, narrators, authors, and themselves as readers. Point of View is similarly important when analyzing informational texts; Wonders frequently asks students to identify authors’ viewpoints.

  • Although many sources refer to it as Opinion Writing, the truth is that, when students are asked to “Explain Why with Reasons” in the upper grades, it is almost always Point of View Writing they are being prompted to do; the difference, according to WFTB, is that Opinion Writing is more open-ended, whereas Point of View writing requires students to choose one of a limited number of stances (usually two or three).

  • I am a huge fan of the Stanford History Education Group’s Read Like a Historian program. The purpose of the program is to teach students to source, contextualize, corroborate, and close read primary and secondary sources. All of these thinking skills require students to consider points of view, as well as literally all of the other Blue Frame questions.

  • Merriam-Webster defines Empathy as: “the action of understanding, being aware of, being sensitive to, and vicariously experiencing the feelings, thoughts, and experience of another of either the past or present without having the feelings, thoughts, and experience fully communicated in an objectively explicit manner.” In other words, empathy is all about understanding the points of view of others. Given the power and importance of this SEL skill, shouldn’t we take every opportunity available to practice it with our students? 

  • Jason Baehr, a philosophy professor at Loyola Marymount, identifies Open-Mindedness as one of the nine intellectual virtues that will improve students’ thinking in all areas of study. He describes this virtue as: “An ability to think outside the box. Gives a fair and honest hearing to competing perspectives.”

  • The frequent consideration of Point of View has crucial metacognitive benefits. From a Bloom’s Taxonomy perspective, discerning the points of view of others requires analysis/inference skills, while determining one’s own point of view is a matter of judgment/evaluation. Before determining a point of view, a student should compare and contrast the available options (Double Bubble) before supporting their chosen point of view with reasons (Left-Sided Partial Multi-Flow).


Bias/Primary and Secondary Sources

The two follow-up questions on the Point of View side of the Blue Frame are:

Is there a specific point of view influencing the content/ideas in your map? Is that point of view biased?

and

Is the information in your map influenced by a primary or secondary source?

The importance of teaching kids about Bias deserves its own blog post. Being keenly aware of bias will, of course, make kids better consumers of social media, news, books, textbooks, websites, and the like, but it will also cause them to be more intellectually humble and honest with themselves. The ability to distinguish between primary and secondary sources is a foundational skill in Social Studies and supports the analysis of bias because each type of source has its own implicit biases.


Historical or Social Issues

The guiding question on the other side of the Blue Frame is:

Are there any historical or social issues influencing the information in your map?

The supporting questions are:

Does a specific time period influence your thinking about the information in your map?

and 

Are there any cultural beliefs that are influencing your thinking?

I find these questions particularly helpful in Social Studies, but they are also quite relevant in literary analysis. When reading historical fiction, or any story written some time ago, students should consider how differences in technology, language, and social/cultural norms affect the narrative. It is also always important to be aware of the historical, social, and cultural circumstances in which an author wrote a novel or story. The same can be said for informational text as well.


Uses and Examples

I believe that, like the other frames, the Blue Frame questions were originally intended to help students reflect on the thinking they have done in the maps. The Bubble Map below, in which I ask students to consider their own biases regarding a character, provides an example.


Adding a Blue Frame question at the bottom of a map like this can help you increase rigor, review concepts and skills, and/or connect the map to other parts of the curriculum.


As I suggested above, the Blue Frame questions are often grade level standards in and of themselves. Whether they are or not, I think it makes sense to teach them explicitly as frequently as possible. As an illustration, here is a map I recently created to help students analyze author’s viewpoint in informational text:


Notice that, in both sample maps above, I used blue font to emphasize that certain questions and prompts pertain to this Frame.


The goal for all of the Frames of Reference questions should be for kids to apply them to their thinking without being prompted to do so. Incorporating them into assignments and/or making them the focus of assignments will help you achieve this goal. I realize this is all a lot to digest, but I hope you have found it helpful and enlightening. Next time, I will review the third and final frame: Red!


Here are the links to my other two posts about the Frames, along with one about the importance of Thinking Maps:

Green Frame: https://spotlightclassrooms.blogspot.com/2021/12/the-meta-cognitive-frames-of-reference.html


Red Frame: https://spotlightclassrooms.blogspot.com/2022/02/the-meta-cognitive-frames-of-reference.html


What's So Great About Thinking Maps?: https://spotlightclassrooms.blogspot.com/2021/10/whats-so-great-about-thinking-maps.html


Always Writing,

Eric Lovein


PS: Check out my post about Summarizing Flow Maps!: https://spotlightclassrooms.blogspot.com/2022/03/thinking-maps-for-fictional-narrative.html


...and my video on Circle Maps!:

https://www.youtube.com/watch?v=vuQ9RkXXZcI


Sunday, January 9, 2022

There Is Brilliance In Every Thoughtful Wrong Answer


This past week I gave each of my students a math problem to do on an index card - collected each of them - sorted them into right and wrong stacks - then decided on one wrong answer to present to the class.  Here are two examples of student work from this past week - one has the correct answer (top) and the other has the wrong answer (bottom).  This idea comes from the activity 'My Favorite No' - video link - this activity is not just a math activity but can be used in any subject area.


This school year I have tried to embrace two driving philosophies in my classroom - 'Variety is the spice of life' (an effort to bring excitement into the classroom) and 'There is brilliance in every thoughtful wrong answer'.

I listened to a webinar last year (Dan Myers) where the guests were talking about how teachers encourage students to try (persevere) and to create a safe environment for making mistakes.  One of the guests (sorry, I cannot remember their name) suggested that there is brilliance in every wrong answer.  I was not real sure about the idea until I started thinking about it and what it looks like in the classroom.  Then I realized that if I changed my mindset of 'correcting errors' to 'identifying points of brilliance' that this could change my students' attitudes toward the challenging skills of math.

But what I was not prepared for was the impact that it had on my instructional decisions.  In order to have mistakes, I had to create opportunities for students to make mistakes - which meant giving students problems to work on (easy enough).  To see the mistakes, I had to be able to see the work - which meant having students write out their thinking so that it was visual.  At this point, I could then talk with students about their 'brilliance' (correctness) and offer insights into what needs to be corrected.

To model for students, I engage in a whole group analysis of the problem - focusing on what is correct in the problem (the brilliance).  And then we discuss what the mistake is.  There are times when we do this whole class and there are times that we do this individually - the idea that individual students can think critically ('The Magic of Mistakes' - Colin Seale).  Critical thinking is a challenge for many students who struggle with certain skills - they need the practice and reinforcement that they are 'brilliant' (correct) in parts of the problem and just need to learn from the small mistakes they do make.

During these difficult times of a pandemic, where students are in and out of the classroom due to no fault of their own, we need to build student confidence and allow students to thrive at every opportunity we can when we do have them inside the classroom.

I encourage you to allow students to make mistakes and go beyond that by having students show their brilliance because each and every student is brilliant in our District - sometimes we just need to show them how brilliant they are.

Give yourself grace during these difficult times and if you have then give yourself more grace.


Teaching and still loving it,  

Kevin Stott                           

De Anza Middle School      

Math 8 & Integrated Math I


Most Viewed Posts